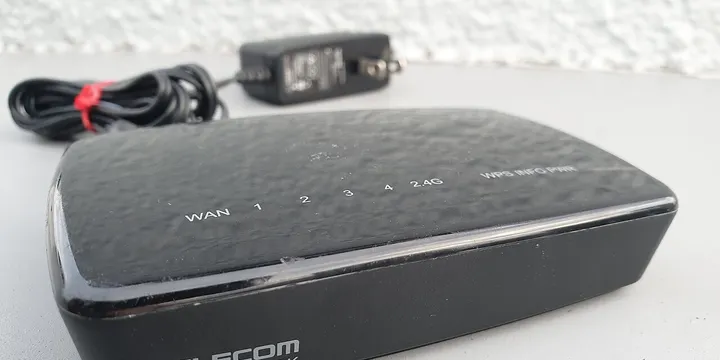
A good home office setup is not about buying expensive furniture. It is about five small decisions — spot, chair height, screen height, light, and routine — that you get right once and then stop thinking about. Get them wrong and you pay for it daily in back pain, eye strain and three hours of unfocused work; get them right and the desk disappears and only the work remains.
This guide walks through nine steps in the order they matter. Everything here costs little or nothing: the two most important items are a few books under your laptop and a rule about when you stop working.
Step 1: Pick a spot with daylight
The single biggest factor in whether a home office works is light. If you can, put your desk near a window — you do not have to face it, and you should not sit with it directly in front of you or behind you, because the screen will become a mirror. A side window is ideal: daylight on your work, soft light on your face, no glare.
If your only option is a dark corner, spend a little money on a good desk lamp with a broad, warm-white light (around 4000–5000 K, which looks close to daylight) instead of the cold blue of an overhead lamp at night. Cheap LED desk lamps do this fine.
Step 2: Get your seat height right
Good posture does not come from an expensive chair — it comes from the chair matching the desk. Sit down and check:
- Feet flat on the floor. If they dangle, your chair is too high or the desk too low. A footrest (or a folded blanket) fixes this immediately.
- Knees at about 90 degrees, slightly below hip height.
- Elbows at 90 degrees when your hands rest on the keyboard, with shoulders relaxed, not raised.
If your desk is too high to lower — a fixed kitchen table, for example — the cheapest fix is a taller chair plus a footrest rather than a new desk. The keyboard height is what your body actually feels.
Step 3: Raise the screen to eye level
This is the step almost everyone skips, and it is the one that causes the most neck pain. The top of your monitor should be at roughly your eye level, so you look straight ahead or very slightly down, never down at a laptop screen all day.
- Laptop-only setup: a stand — or two thick books — plus a separate keyboard and mouse. This lifts the screen ~15 cm and costs nothing.
- Monitor setup: the top third of the screen at eye level. Adjust the stand or stack it on something stable.
- Minimum distance: an arm’s length (about 50–70 cm). If you squint, increase the font size rather than leaning forward.
Step 4: Place the light, not the lamp, where it belongs
Glare from a window or a lamp on your screen is a hidden focus killer. The rule: the light source should be to the side of your screen, never behind it or in front of it. If you can see the lamp’s reflection in the screen, move the lamp 90 degrees to the side.
Ideal setup: daylight from the side during the day, and a desk lamp by the side (not on the keyboard) when the light goes.
Step 5: Set up your video-call face
One in four workdays, someone is going to see you on a camera. A setup that looks fine takes five minutes:
- Laptop stand raises the camera to eye level — the same stand from Step 3. Eye-level camera looks professional; a camera below your chin looking up does not.
- Light on your face, not behind you. If the window is behind you, you are backlit — close the curtains or turn the desk so light hits your face.
- Clean up the background once, not every day. A bookshelf or a plain wall beats clutter, and it needs one minute of tidying, not a studio.
- A cheap headset or even wired earphones beats laptop speakers for meetings, both for you and for the people you talk to. If you choose a wireless headset, the Bluetooth setup guide covers pairing and audio-output checks.
If you are presenting rather than interviewing, the presentation preparation guide covers readable slides, speaker notes and a technology fallback.
Step 6: Make switching devices painless
Most people work on a laptop, a phone and sometimes a tablet, and switch between them all day. That switching is where focus leaks — it takes about a minute to refocus after each context shift.
Two fixes that are practically free:
- A charging spot with one cable for everything — a USB-C dock or hub on the desk that connects your laptop to the monitor, keyboard and mouse. Unplug one cable when you leave, plug one cable when you return.
- One consistent note app on all devices. Notes you take on your phone should be on your laptop five seconds later — the personal knowledge base guide shows how to build this so notes actually survive.
If you juggle several devices and accounts, the universal device access guide covers the setup in more detail.
Step 7: Secure your home-office network
Your home network is now also your office network. A few minutes of settings make a real difference:
- Change your router’s default admin password. It ships with a password that is documented on the Internet.
- Turn on WPA2 or WPA3 encryption if it is not already on, and use a passphrase you do not use anywhere else.
- Enable your router’s firmware updates — most routers have an “auto-update” switch in the admin page. If you are configuring a new router, the home Wi-Fi setup guide puts the security settings in a complete order.
- If you add smart plugs, cameras or monitors to the same network, give them a separate guest network or at least change their default passwords — the home IoT security guide walks through this in detail.
If you do any work on public Wi-Fi (cafés, trains), use a VPN or your phone’s hotspot instead of the open network. And if your home Wi-Fi itself is slow, the 10 fixes that actually work cover placement, channels and hardware.
Step 8: Rules for starting and stopping
The home office has no commute to separate work from life, so you have to build your own:
- A start ritual. Same time, same chair, same first task. Even a two-minute “write down the three things I want done today” ritual tells your brain that work has started — write it down in your note system, not just in your head.
- Breaks on purpose, not by accident. The tidy version of a break is every 60 minutes: stand, drink water, look out a window for two minutes. Your eyes need distance vision, your back needs standing.
- An end ritual. A “shutdown checklist” — save shows, close the laptop, put the headphones away. It sounds silly and it works. The same logic applies to your phone: the 7-day digital detox plan is a good way to reset when screen time has crept up.
Step 9: Revisit the setup after two weeks
Body signals are the best reviewer. After two weeks of working at your new setup, ask three questions:
- Do my shoulders ache at the end of the day? (Keyboard too high.)
- Do I lean forward or squint? (Screen too far, font too small.)
- Do I dread starting work, or does the routine feel automatic? (Might be a routine problem, not a furniture problem.)
Adjust one thing at a time and give it a week. Small changes beat one big redecoration every time.
The five-minute fit check
Before buying anything, do one quick check with the setup you already have. Sit in your normal working position and ask a friend to look from the side, or use your phone camera: your head should sit over your torso, your shoulders should be relaxed, and your elbows should stay close to your body. Check that the top of the monitor is at or just below eye level, your wrists continue the line of your forearms, and both feet have stable support. These are OSHA workstation goals, not a demand for one perfect posture; comfort and adjustability matter more than copying someone else’s desk.
If your feet do not reach the floor, add a footrest before raising the chair. If the screen is too low, raise it and use a separate keyboard and mouse. If the screen reflects a window or lamp, move the light source rather than tilting your head or screen into an awkward position. Recheck after a 30-minute work block: aches, numbness or persistent squinting are signals to stop and adjust, not problems to work through. See the OSHA Computer Workstations eTool for the full illustrated checklist.
Quick wins checklist
- Desk near a window, lamp to the side of the screen
- Feet flat, knees ~90°, elbows ~90°
- Laptop on a stand, external keyboard and mouse
- Top of screen at eye level, an arm’s length away
- Camera at eye level, light on your face
- One USB-C cable on the desk for all devices
- Router password changed, WPA2/WPA3 on
- Start ritual and a shutdown checklist
- Revisit ergonomics after two weeks
You do not need a standing desk, a three-monitor rig or an ergonomic chair to have a home office that works. You need the screen up, the light right, the network locked down — and a clear line between work and the rest of your day.
Hero image: Shixart1985, CC BY 2.0, via Wikimedia Commons.