Quick answer
Prepare a presentation by choosing one audience and one outcome, building a short beginning-middle-end structure, using readable slides, rehearsing aloud with a timer, and testing the room or video setup before you speak.
A presentation feels difficult when it is treated as a slide-making task. It is really a short guided conversation: you help a particular audience understand one idea, make one decision or remember one useful next step.
The plan below works for a meeting, class, interview, conference talk or remote presentation. It also works if you are using PowerPoint, Google Slides, a PDF or no slides at all.
1. Name the audience and the outcome
Write two sentences before opening your slide software:
- Audience: Who will be listening, and what do they already know?
- Outcome: What should they understand, decide or do when you finish?
“Explain our new process” is too vague. “Help the support team choose the new escalation path and use it on Monday” gives you a boundary. Every example, slide and detail must earn its place by serving that outcome.
2. Reduce the topic to one message
Choose the sentence you want someone to repeat afterward. Put it at the top of your notes, not just on the title slide. For example: “The faster workflow is safer because it removes the duplicate approval step.”
Then select two or three supporting points. A short presentation usually becomes clearer when you cut material rather than speak faster. Save interesting background for a handout or a follow-up link.
Use a simple structure:
- Beginning: the problem, question or promise
- Middle: two or three points with evidence or examples
- End: the answer, decision or next action
Toastmasters recommends deciding what you want to share and how you will say it before choosing visual aids. That order keeps the slides in service of the message instead of making the message follow the template.
3. Gather proof and examples
A claim is easier to understand when the audience can see what it means. Collect only the material that supports your message:
- One concrete example or short story
- The most useful number, comparison or quotation
- A before-and-after picture or process
- The decision the evidence supports
Label sources while you work. Do not paste a dense research page into a slide and expect the audience to read it. Put a short source note on the slide when needed, and keep fuller references in your notes or handout.
4. Storyboard the talk before designing it
Make a rough list of the slides or speaking beats. Give each one a job and a transition:
| Beat | Job | Transition |
|---|---|---|
| Opening | Make the problem relevant | “Here is what causes it.” |
| Point 1 | Explain the current situation | “That leads to…” |
| Point 2 | Show the evidence or option | “So the practical choice is…” |
| Close | State the action | “Here is what happens next.” |
This is a storyboard, not a contract. Move or remove beats until the route feels inevitable. If a slide has two unrelated jobs, split it or choose the more important one.
Write the opening and closing early. The opening earns attention; the closing tells people what to do with what they heard. The middle is much easier to build once those two ends are fixed.
5. Build slides people can read from a distance
Slides are there to support your explanation, not to become a teleprompter. Microsoft recommends readable fonts, simple text, limited wording and enough contrast; its presentation guidance says to avoid text sizes smaller than 18 points, with larger type often needed in a big room.
For each slide:
- Use one main idea and a short, descriptive heading
- Prefer a diagram, photo or short list to a paragraph
- Keep labels on charts large enough to read
- Use consistent alignment and restrained decoration
- Check the slide at the back of the room or in the meeting window
Do not shrink a crowded slide until it technically fits. Split it, simplify it or move detail to a handout. Toastmasters makes the same distinction: a visual aid should reinforce the message, not distract from it or make you turn your back to the audience.
6. Make the presentation accessible
Assume that people in the room have different ways of seeing, hearing and processing information. The University of Colorado’s accessibility guidance recommends making presentation materials available in both paper and digital formats, and verbalising important visual information rather than relying on the slide alone.
That means:
- Say what an important chart, image or diagram shows
- Do not use colour as the only way to distinguish two choices
- Use meaningful headings and readable contrast
- Provide a digital copy or accessible link when appropriate
- Ask the venue about microphones, captions, seating and access needs
Pause after advancing a slide so people have time to read it. Accessibility usually improves the experience for everyone, not only the person who requested an accommodation.
7. Write speaker notes, not a second article
Your private notes should remind you what to explain, not give you a wall of text to read. Under each slide, write:
- The point in one sentence
- One example or fact
- The transition to the next idea
Add a prompt for any number, name or quotation that must be exact. Otherwise, use keywords. If you lose your place, the slide heading and your next transition should be enough to recover.
Read the slide once before you practise, then rehearse while looking up. The audience came to hear your explanation; reading every word creates a race between their eyes and your voice.
8. Rehearse aloud with the real materials
Silent reading is not rehearsal. Speak the entire presentation aloud, with the actual slides, clicker, microphone, demo or screen sharing you expect to use.
Do one rough run to find missing logic. Then do a timed run without stopping to edit. Mark sections that run long, explanations that sound complicated and transitions where you say “um” because the next idea is not ready.
PowerPoint’s Speaker Coach can provide feedback on pacing, filler words, reading slides and other delivery habits. Microsoft reports a suggested speaking range of 100 to 165 words per minute, but that is a guide, not a target you must force. Clear pauses and a pace your audience can follow matter more than a number.
Record one rehearsal if you can. Listen for whether the main message arrives early, whether the examples are understandable and whether the ending actually gives a next step.
9. Test the room and prepare a fallback
Arrive early enough to test the things that can fail:
- Laptop power, display adapter and clicker
- Slides, videos, fonts and embedded audio
- Microphone volume and where you will stand
- Remote camera, screen sharing and notifications
- Lighting, seating, sight lines and the clock
Keep a PDF backup and a copy of the presentation somewhere you can reach without relying on one cable or one cloud account. If attendees need the handout on their phones, the QR code guide covers publishing a tested link with a plain-text alternative. For a demo, prepare screenshots or a verbal explanation of the result. A fallback is not pessimism; it lets you keep helping the audience when the technology does not cooperate.
10. Deliver in beats, then handle questions
Before you start, plant both feet, breathe out and look at a person or camera. Say the opening sentence slowly. Pause after important points instead of filling every gap.
Look at the audience, not the projection. Use gestures that match the idea and move only with a purpose. Toastmasters’ practical advice includes timing rehearsals, arriving early, pacing yourself, using subtle notes and recovering from mistakes without apologising for every small slip.
For questions, repeat or reframe the question if the room may not have heard it. Answer the actual question briefly, say when you do not know, and offer the next place to verify it. If a question deserves a separate discussion, park it rather than letting one person take over the whole presentation.
Finish by repeating the message and the next action. Then stop. A clean ending is more useful than adding one last slide because silence feels unfamiliar.
A simple preparation schedule
| When | What to finish |
|---|---|
| First session | Audience, outcome, message and three supporting points |
| Next session | Evidence, storyboard, slides and speaker notes |
| Day before | Full timed rehearsal, accessibility check and backup export |
| Before speaking | Room or video test, water, notes and a calm opening pause |
If nerves are the main obstacle, the stop overthinking guide has a short pre-event routine. If you present from home, the home office setup guide covers camera, lighting and desk choices. The goal is not a flawless performance. It is a prepared message that reaches the people who came to hear it.
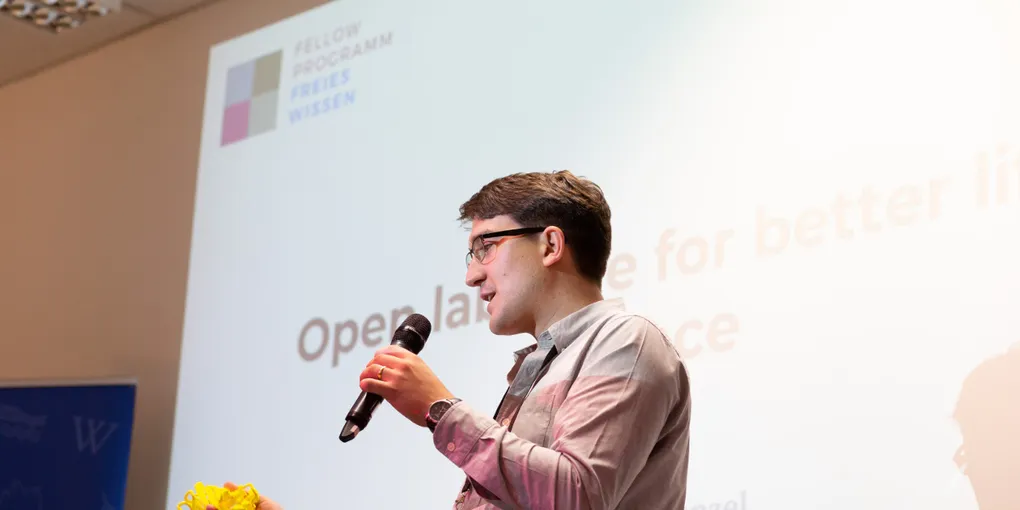
Hero image: Ralf Rebmann, CC BY-SA 4.0, via Wikimedia Commons.
Sources
- Microsoft Support: Tips for creating and delivering an effective presentation
- Microsoft Support: Rehearse your slide show with Speaker Coach
- University of Colorado Boulder: Accessible Presentations
- Toastmasters International: 5 Pointers to Make Your Visual Aids Valuable
- Toastmasters International: 90 Tips From Toastmasters
Frequently Asked Questions
How far in advance should I prepare a presentation?
Start as soon as you know the date. A practical schedule is to define the message first, draft the structure next, then leave at least one full rehearsal and one technology check before the event. A short presentation still needs a complete run-through.
How many slides should a presentation have?
Use only the slides needed to make the message clearer. There is no universal slide count: one idea, comparison, image or decision may need one slide, while a simple story may need fewer. Remove slides that repeat what you will say.
How do I stop reading my presentation slides?
Put keywords rather than a script on the slide, write fuller prompts in private speaker notes, and rehearse while looking at the audience or camera. If the slide contains every sentence, it will compete with your voice.
What should I do if I feel nervous before presenting?
Arrive early, test the setup, slow your first sentence and pause between ideas. Rehearse the opening and the transition into your main point until they are familiar; you do not need to memorise every word.