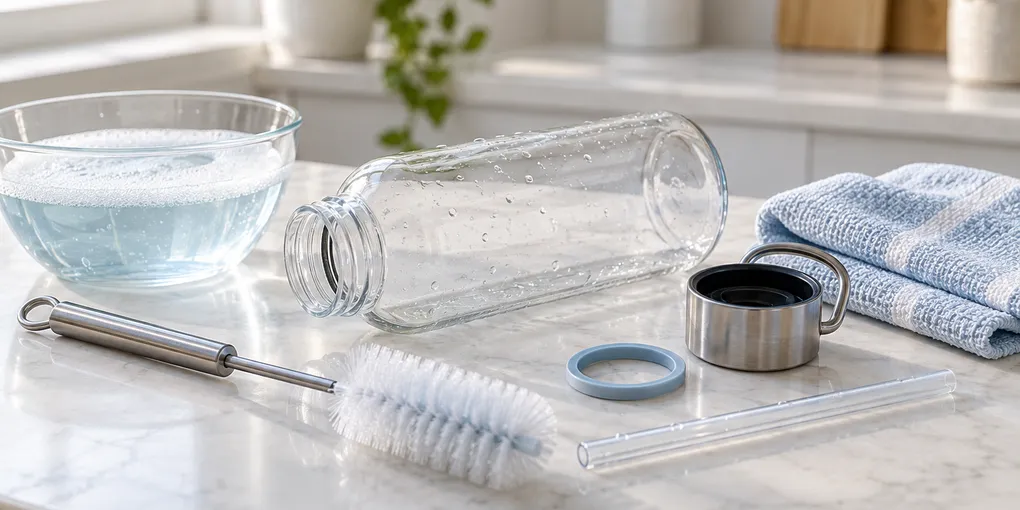
Quick answer
Empty the bottle, check the manufacturer care instructions, then separate the lid, gasket and straw. Wash the body and parts with warm water, mild dish soap and a suitable brush, flush narrow channels, rinse well and air-dry every piece separately with the lid off. Use the dishwasher only when the bottle and each part are marked safe; replace cracked seals or any part that stays moldy or foul-smelling after a complete clean.
The easiest way to keep a reusable water bottle clean is to make the routine boring: empty it, take the lid apart as far as the care guide allows, wash every surface, rinse away the soap and let the pieces dry separately. The bottle body is rarely the difficult part. Threads, mouthpieces, straws and silicone gaskets are where film and stale smells tend to linger.
This guide covers plastic, glass and insulated bottles without pretending that every model has the same dishwasher or chemical limits. If your bottle has a care label or manual, follow it first. Hydro Flask’s official cleaning guidance is a useful example: some bodies are dishwasher-safe, but parts should be separated, bleach or chlorine cleansers avoided, and hand washing with warm soapy water is a dependable fallback.
The quick daily routine
1. Empty it instead of topping it up
Pour out leftover water or drink as soon as you can. Do not keep adding fresh water to a bottle that still has yesterday’s water, a sweet drink or a protein shake in it. Sugars, proteins and flavorings leave a film that is harder to remove than plain water residue.
If the bottle has been shared, or if it held milk, a smoothie or coffee, wash it promptly. BBC Future’s reporting on reusable bottles explains that hands, mouths and the surrounding environment add microbes, and that a closed bottle at room temperature is not a storage system.
2. Separate the pieces
Unscrew the lid. Remove the straw, mouthpiece, gasket or silicone ring only if the design allows it without damage. Some seals have a small pull tab; others are not intended to be removed at every wash. Never pry a gasket with a sharp knife or force a part that the manufacturer says should stay in place.
Put the small pieces in a bowl so they do not disappear down the sink. Look at the underside of the gasket and inside the lid: these shaded, damp spaces deserve as much attention as the bottle opening.
3. Wash with warm water, mild soap and the right brush
Fill the bottle with warm water and add a small drop of mild dish soap. Scrub the inside with a bottle brush, reaching the shoulder, base and threads. Wash the outside and mouth separately with a soft sponge or cloth.
Use a small straw brush or pipe cleaner for a narrow tube. Push it all the way through if the design permits, then flush water through the channel from both directions. Wash the gasket with your fingers or a soft brush. A soft toothbrush is useful around ridges and hinge points.
The KeepCup cleaning guide gives the same practical baseline—warm water, dish soap and a bottle brush—while emphasizing the lid, threading and removable seals.
4. Rinse and dry everything apart
Rinse until no slippery soap remains. Then place the bottle upside down or on a drying rack, with the lid, straw and gasket separated. Leave the cap off. A closed bottle can look clean while trapping a damp pocket around the seal.
Drying is part of cleaning, not a cosmetic extra. If you need the bottle quickly, wipe the outside and shake excess water from the parts, but still give the inside and lid channels time to air-dry. Reassemble only when the pieces are genuinely dry.
When a deeper clean is worth doing
Use a deep-clean routine when the bottle smells after ordinary washing, feels slimy, shows a cloudy film or held something other than water. Start by repeating the normal wash with every removable component separated. Many odor problems are simply a gasket or straw that was skipped.
For an approved material-safe treatment, follow the bottle maker’s instructions. Hydro Flask’s official guide describes a mixture of hydrogen peroxide and baking soda for stubborn interior residue, with a measured soak followed by soap-and-water cleaning. That does not make the recipe universal: check the manual before putting peroxide, vinegar, tablets or any other cleaner against a particular finish, lining or seal.
Never mix cleaning chemicals. In particular, do not improvise with bleach, chlorine, ammonia or combinations of acids and bases. A stronger-smelling mixture is not automatically a cleaner one. Rinse thoroughly after any approved treatment and dry every part before use.
Dishwasher decisions: body, lid and gasket are separate
The word “dishwasher-safe” may apply to the bottle body but not the whole assembly. Check the manual for each component and for the exact model. Insulated bottles, painted finishes, plastic lids, straws and silicone seals can have different limits.
If the guide allows a dishwasher:
- Separate the lid, straw, gasket and bottle.
- Put each piece on the rack specified by the manufacturer.
- Avoid cleansers containing bleach or chlorine when the care guide warns against them.
- Inspect the seal after the cycle and let all parts dry before reassembly.
If you cannot find a clear answer, hand wash with warm soapy water and a suitable brush. That is slower than guessing once and replacing a warped lid.
What to do about mold, stains and persistent odor
A faint tea or coffee stain is different from fuzzy growth, a cracked seal or a smell that returns immediately after cleaning. For ordinary staining, use only an approved deep-clean method and a non-abrasive tool. Do not use steel wool or a harsh scouring pad on an unknown finish; scratches can make future cleaning harder.
Stop and inspect closely if you see black or green spots, a split gasket, softened plastic, peeling lining or residue in a channel you cannot reach. Replace the affected removable part if the maker sells it. If the contamination is inside a damaged or non-serviceable component, replacing the bottle is the sensible hygiene decision.
A simple maintenance schedule
| When | What to do |
|---|---|
| After each use | Empty it; rinse promptly if a full wash is not yet possible. |
| Daily | Wash the body, lid, mouthpiece and straw with warm soapy water; air-dry open. |
| Weekly or after flavored drinks | Disassemble as allowed and brush threads, seals and narrow channels carefully. |
| When odor or film appears | Deep-clean with a method approved for the bottle’s material, then inspect every part. |
| When parts crack or stay moldy | Replace the seal, lid or bottle rather than hiding the problem with fragrance. |
For nearby kitchen-care routines, see our guides to cleaning a coffee maker, cleaning a coffee grinder, cleaning a blender and cleaning an air fryer. If the real problem is a crowded sink and missing tools, organizing a small kitchen can make the routine easier to repeat.
Frequently Asked Questions
How often should you clean a reusable water bottle?
Wash it after each day of use, and sooner if it held milk, a smoothie, coffee or a protein drink. A quick rinse is not enough for the lid, threads, straw or gasket. Deep-clean removable parts when odor, film or residue remains after normal washing.
What is the best thing to use to clean a water bottle?
Warm water, a small amount of mild dish soap and a bottle brush are the dependable starting point. Use a narrow straw brush for channels and follow the bottle maker’s instructions for tablets, baking soda, peroxide, vinegar, dishwasher cycles and finishes.
Can you put a reusable water bottle in the dishwasher?
Only if the manufacturer marks that bottle and its individual parts dishwasher-safe. Separate the lid, straw and gasket, place pieces where the care guide says, and avoid assuming that a dishwasher-safe body makes a silicone seal or insulated lid safe too.
How do you get a bad smell out of a water bottle?
Disassemble the lid, wash every part with warm soapy water, brush the threads and straw, rinse thoroughly and dry completely. Then use only a deep-clean method approved for that material. If mold, cracks or odor remain, replace the affected seal, lid or bottle.