How to Organize a Small Kitchen: 10 Steps for More Space
Quick answer
Organize a small kitchen by measuring the storage you already have, removing duplicates, grouping items by how you use them, and keeping everyday tools close to the work zones where they belong. Use vertical space and a few measured containers for visibility, keep food storage clean and separate, and finish with a short weekly reset instead of buying more organizers.
A small kitchen does not need a showroom makeover. It needs fewer decisions between opening a drawer and finishing a meal.
The most useful system is built around your real movements: where groceries arrive, where you prepare food, which pan you reach for, and what keeps getting stranded on the counter. The goal is not to hide everything. It is to make the things you use visible and easy to return.
Use these ten steps for a rented apartment, a narrow galley kitchen or a kitchen with too few drawers. The advice is practical rather than design-specific, so adapt it to the cabinets, appliances and food-safety requirements you actually have.
1. Photograph and measure the kitchen before changing it
Take a photo of each cabinet, drawer and counter. Measure the width, depth and height of the places where you might store something. Record obstructions such as hinges, pipes, outlets, door swings, shelves that do not move and the clearance needed to open an appliance.
Measure the space you have—not the optimistic space behind a door or above a shelf. The Wirecutter pantry-organization guide also recommends measuring before buying storage containers. That one pause prevents a common small-kitchen failure: filling a limited cabinet with organizers that reduce usable capacity.
Make a simple sketch of three working zones:
- Prep: cutting board, knives, mixing bowls and everyday utensils.
- Cook: pans, pot holders, cooking tools and oils that belong safely away from heat.
- Clean: sink, dish soap, towels, drying space and cleaning supplies.
The zones do not need to be large or perfectly separated. They only need to reflect how you move.
2. Empty one zone, not the whole kitchen
Choose one drawer, one cabinet or one section of counter. Put everything from that zone on a table or clean floor, then wipe the empty surface. Working in a small batch gives you a visible finish line and keeps the kitchen usable while you organize.
Sort each item into four groups:
- Use every day or most weeks.
- Use occasionally but genuinely need.
- Belongs somewhere else.
- Broken, duplicated, expired or unlikely to be used.
3. Remove duplicates and unsafe clutter
Keep the best version of repeated tools, not every version you have accumulated. A small kitchen often gains more space from removing three rarely used gadgets than from buying a clever rack.
Check food packages for leaks, pests, damage and dates that matter to your household’s storage decisions. Do not taste questionable food to decide whether it is safe. For a broader food-waste routine, the EPA’s guidance on preventing wasted food at home recommends checking the refrigerator, freezer and pantry before shopping and planning around food that needs to be used.
Dispose of chemicals and damaged electrical items according to local instructions. Keep cleaning products away from food and food-contact equipment, even if the only available space seems convenient.
4. Create zones by task and frequency
Group items according to the task they support, then place the groups according to frequency. Put the tools used at nearly every meal between waist and eye level. Move occasional baking equipment, serving pieces and seasonal items to higher shelves or the back of deeper cabinets.
Useful groups include:
- breakfast and drinks;
- everyday cooking;
- baking;
- food storage and leftovers;
- serving and entertaining;
- cleaning and laundry-adjacent supplies.
A category is useful only if it helps you find and return something. “Random small things” is not a category. If one group is too large, split it by action: “measure and mix” is easier to use than “baking stuff.”
5. Make the counter a work surface again
Clear every item that does not earn its counter space. Return mail, unopened groceries, spare appliances and decorative objects to their proper homes before buying a counter organizer.
For appliances, use a simple rule:
- Daily: keep out if moving it makes you less likely to use it and it does not crowd the prep area.
- Weekly: store in an easy-to-reach cabinet or on a shelf near the relevant zone.
- Rarely: store higher, farther away or outside the kitchen if another safe location exists.
If several small items must remain out, group them on one tray. The tray creates a boundary and lets you move the group when you need the full counter. Do not use a tray to excuse an ever-growing pile; remove items when the group no longer serves a clear routine.
6. Use vertical and hidden space carefully
Look at the inside of cabinet doors, the gap above short shelves and the wall space that is not exposed to steam or heat. A narrow shelf riser, hooks, a magnetic strip or an over-door organizer can help, but only when it fits the measured space and stays secure.
Keep heavy objects low and stable. Do not hang a heavy pan where it can fall onto a person, block a doorway or interfere with a cooktop. Do not cover ventilation openings, electrical controls or access panels. In a rental, prefer removable solutions and check whether adhesive, screws or weight limits could damage the property.
7. Make drawers and cabinets easy to scan
Store pans vertically when the cabinet allows it, nest matching bowls and keep lids with the containers they fit. Use dividers for utensils only when they stop items from sliding into one another. Leave a little breathing room so you can remove the item at the back without unloading the entire shelf.
For dry food, choose containers only after checking the shelf. Airtight, labeled containers can help with bulk foods and spills, but transferring every package is not automatically an improvement. Keep the product name and relevant date information visible.
The pantry-organization guide covers visibility, use-first zones and shelf-by-shelf sorting in more detail. In a small kitchen, a single labeled bin for “use soon” may be more useful than a full set of matching jars.
8. Organize the refrigerator with safety and visibility in mind
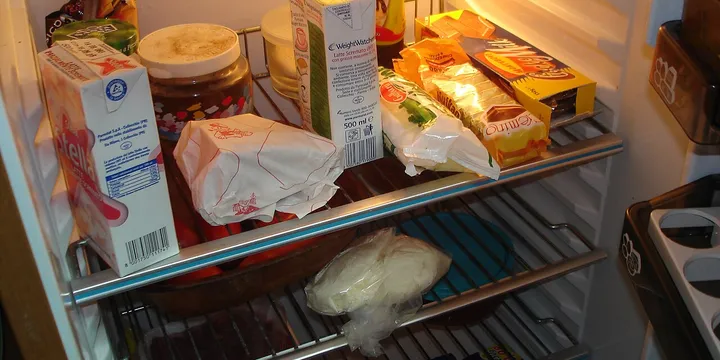
A small kitchen’s storage system includes the refrigerator. Keep raw meat, poultry, seafood and eggs separate from other foods as the FDA’s safe-food-handling guidance recommends. Use sealed containers or packaging that prevents raw juices from reaching ready-to-eat food, and follow the storage instructions for your appliance and local food-safety guidance.
Give the refrigerator simple zones: ready-to-eat foods, ingredients for the next few meals, drinks, produce and items that need attention soon. Do not pack food so tightly that you cannot see what is behind it or clean a spill. A small “eat first” area at eye level can prevent forgotten leftovers, but label it clearly and discard food when your safety guidance says it is no longer suitable.
For the cleaning side of this reset, use the refrigerator-cleaning guide rather than putting food back into a damp or dirty shelf.
9. Store tools where the movement happens
Run through a normal meal in your head—or better, watch yourself make one. Notice every awkward reach. If you cross the kitchen for a spatula, move the spatulas closer to the cooktop. If the drawer beside the sink is full of baking tools while you repeatedly need dish towels there, swap the jobs.
Keep knives secure and easy to retrieve without reaching blindly into a drawer. Keep heat-sensitive, flammable or spill-prone items away from the cooktop. Store heavy appliances where you can lift them without twisting or stretching. If an item is used only with one appliance, storing the pair together may save more time than organizing by object type.
10. Build a five-minute reset
A small kitchen stays organized when the reset is shorter than the mess. At the end of a cooking day, return tools, wipe the working surface, close food packages and move anything that belongs elsewhere. Once a week, check the fridge, dry-food zone and freezer, bring older safe items forward and add missing staples to your grocery list.
The grocery-list guide can help turn that check into a deliberate shopping routine. The EPA also recommends including quantities and looking through existing food before buying more; that fits naturally into a small-kitchen reset.
After two or three weeks, change the system where it fails. If one drawer repeatedly becomes a dumping ground, it may be assigned the wrong job. If you never use the container stack at the back, move the contents or reduce the category. Organization is not a promise to keep a bad layout forever.
A kitchen works when you can see what you own, reach what you use and put it back without a second decision. Measure first, remove what does not earn its place, organize by task, protect food and counter space, and let your real cooking habits—not a photograph—decide the final layout.
Sources
- Wirecutter: How to Organize Your Pantry So It Works for You
- U.S. EPA: Preventing Wasted Food at Home
- FDA: Safe Food Handling
Hero image: Tomwsulcer, public domain, via Wikimedia Commons.
Sources
Frequently Asked Questions
What is the best way to organize a small kitchen?
Start by measuring your cabinets, drawers and usable wall space, then remove duplicates and group what remains by task and frequency. Keep everyday cookware and tools close to the preparation area, less-used items higher or farther away, and leave enough open counter space to work safely.
How do you organize a small kitchen without a pantry?
Create a pantry zone in one cabinet, a drawer unit or a narrow rolling cart. Group dry foods by use, keep packages visible, rotate older safe items forward, and use containers only after measuring the shelf so they do not waste more space than they save.
How do I get more counter space in a small kitchen?
Remove items that do not belong on the counter, store appliances according to how often you use them, and group unavoidable daily items on one movable tray. Use a wall, cabinet door or vertical shelf only when it does not block ventilation, heat, plumbing access or safe food preparation.
How often should you reset a small kitchen?
Do a five-minute reset after the busiest cooking days and a short weekly check of counters, the fridge and the pantry zone. Return items to their assigned homes, move older food forward, remove obvious waste, and change the system when you keep reaching for the same item somewhere else.