How to Clean an Air Fryer: 10 Steps for Grease and Odor
Quick answer
Unplug and cool the air fryer, then remove and wash the basket, drawer and crisper plate with warm soapy water. Wipe the interior, heating area and exterior with a damp cloth, using only the tools your manual allows; dry every part before reassembly and never assume a component is dishwasher-safe.
An air fryer is easy to ignore because the basket looks small. That small space can still collect crumbs, cooking oil and sticky sauce around the basket, drawer, vents and heating area. Leftover grease can create smoke or stale odors the next time you cook.
The reliable method is simple: cool the appliance, wash the removable parts, wipe the inside without flooding it, and protect any nonstick coating. Read your model’s manual first. Air fryers differ in their dishwasher instructions, coatings, heating-element access and removable parts. The Consumer Reports cleaning guide and Philips’ model guidance both make that manual-first boundary clear.
1. Find the manual and identify the parts
Look for the model number on the base, back or rating label, then open the manufacturer’s care instructions. Note which pieces come out, whether the basket or crisper plate is dishwasher-safe, and what the manual says about the heating element, window, drip area and any special coating.
A basket air fryer may have a basket inside a drawer. An air-fryer oven may also have racks, a crumb tray, a rotisserie accessory or a door window. Do not apply a cleaning instruction for one design to another. If you cannot find the manual, start with hand-washing and a damp-cloth method rather than guessing that a part can be immersed or put in a dishwasher.
The Consumer Reports air-fryer guidance is a useful general sequence, not a replacement for your manufacturer’s instructions.
2. Unplug the appliance and let it cool
Switch the air fryer off, unplug it and wait until the basket, drawer and interior are cool enough to handle. Move it to a stable, dry work surface. Put a towel underneath if the drawer may drip.
Do not clean a hot basket with cold water. The temperature change is uncomfortable to handle and can make stuck-on residue smear instead of loosen. Never clean while the appliance is running, and do not pull on the cord to move it.
Keep the electrical base, plug, cord, control panel and vents away from standing water. If the cord is damaged, the casing is cracked, or the appliance has an electrical fault, stop using it and arrange service rather than trying to clean around the problem.
3. Empty crumbs, oil and loose food
Remove the drawer, basket, crisper plate, racks and crumb tray as the manual describes. Tip loose crumbs into the bin or brush them out with a dry, soft brush. Pour cooled excess oil into a suitable container for disposal; do not pour grease down the sink.
Check the corners and the underside of the crisper plate. Small crumbs can hide under a removable insert and later burn against the hot surface. If the food is still warm, give it more time to cool before handling it.
This dry first pass keeps wet crumbs from becoming a paste in the basket holes and means you need less scrubbing later.
4. Wash the removable parts gently
Fill a sink or basin with warm water and a small amount of mild dish soap. Wash the basket, drawer, crisper plate and other removable food-contact parts with a soft sponge or cloth. Consumer Reports recommends warm, soapy water and no abrasives; it also notes that a stuck-on part can be soaked before cleaning.
If your manual approves the dishwasher, follow its loading instructions and let the parts cool before placing them inside. Dishwasher-safe does not mean every accessory is safe: a model may allow the basket but exclude a probe, rack, seal or special insert. When the manual is silent, hand-wash.
Do not use steel wool, a metal scraper, a knife or a scouring powder on a coated basket. The Philips cleaning instructions similarly limit brush choice around the heating element, and the same gentle principle protects removable coatings.
5. Soak baked-on grease instead of attacking it
For dried sauce or baked-on oil, leave the removable parts in warm or hot soapy water until the residue softens. The exact time depends on the food and the manufacturer’s instructions; a second soak is better than harder scrubbing.
Use a soft brush for basket holes only when it cannot catch or scratch the coating. A wooden skewer or toothpick can help clear an individual blocked hole, but work carefully and do not force it through a non-removable screen. Rinse every part until it no longer feels slippery, then inspect it under good light.
If a nonstick surface is flaking, chipped or badly scratched, stop using that basket. Consumer Reports advises contacting the manufacturer for a replacement rather than continuing to cook with a damaged coating.
6. Wipe the inside and heating area
With the basket and drawer removed, wipe accessible interior surfaces with a damp cloth and a little mild dish soap if your manual permits it. Wring the cloth out well. You want a damp wipe, not a stream of water running toward the controls or vents.
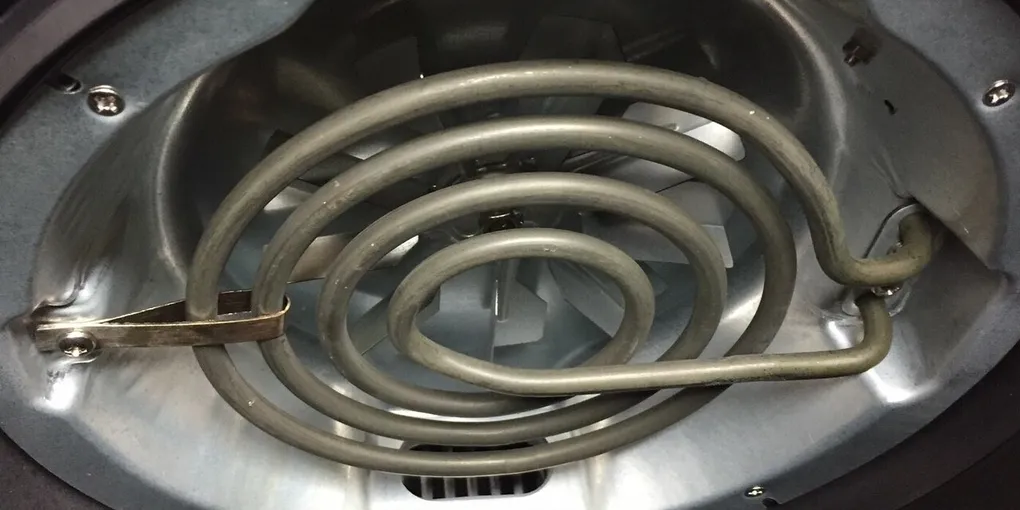
Look above the basket for grease or crumbs near the heating element. Philips’ cleaning guidance says to unplug and cool the appliance, remove the pan and basket, and use a soft sponge with hot water; it allows a soft-to-medium bristle brush for residue on some models and specifically rejects steel-wire or hard-bristle brushes that could damage the element’s coating. Treat that as model guidance: follow your own manual before turning the appliance upside down or brushing near the heater.
Never scrape the heating element with metal, spray cleaner into the cavity or immerse the main unit. If grease is hidden behind a sealed panel, leave it for a technician.
7. Clean the exterior, vents and controls
Wipe the outside, handle and control panel with a barely damp cloth, then dry with a clean towel. Use a cotton swab or soft dry brush around buttons and seams only if it does not shed fibres into the appliance.
Do not spray cleaner directly onto the air fryer. Do not push liquid into the fan outlet, display, switches or cable connection. For an air-fryer oven, use the manual’s method for door glass and do not force liquid between double panes.
If a strong cleaner is tempting, skip it. Poison Control warns that household cleaning products should not be mixed and that some combinations, such as bleach and ammonia, create irritating fumes. Use one mild product at a time, follow its label, ventilate the area and keep cleaners away from food and children.
8. Deal with lingering smells
First remove the cause: wash the basket and drawer, clear crumbs from the interior and wipe grease from the heating-area guard. If an oily or saucy meal left a smell, soak the removable parts again in soapy water before rinsing them.
Consumer Reports describes a 30-to-60-minute soapy-water soak for lingering odors and mentions rubbing lemon on the basket and drawer before washing them again. Treat that as an optional removable-part method, not a reason to put lemon, water or fragrance inside the electrical base. Never cover vents or run an improvised bowl of liquid in the appliance.
If the smell is chemical, electrical or like burning plastic, unplug the machine and stop using it. Cleaning cannot repair damaged wiring, insulation or a failing component.
9. Rinse and dry everything completely
Rinse soap from every removable part. Dry the basket, drawer, crisper plate and racks with a clean towel, then leave them separated until no water remains in seams or holes. Wipe the appliance cavity dry as well.
Do not reassemble a wet air fryer and store it closed. Trapped moisture makes the next use unpleasant and can leave residue in places you cannot see. If your manual gives a specific drying or empty-run instruction after cleaning, follow that instruction; otherwise, let the parts air-dry rather than inventing a high-heat cycle.
Before plugging the appliance back in, check that the cord, outlet area and base are dry.
10. Reassemble, test and prevent the next deep clean
Replace the crisper plate, basket, drawer, racks and other accessories in their correct positions. Make sure the drawer closes fully and nothing touches the heating element. Run an empty test only if your manual recommends it, and stay nearby. Stop if you see unusual smoke, smell burning or hear a new electrical noise.
For routine care, remove crumbs and wash food-contact parts after every use. Give the interior a damp wipe when grease is visible, and inspect the heating area when smoke or odor returns. Saucy food deserves attention sooner than a dry item.
The same removable-parts and manual-first approach works elsewhere: the coffee-maker cleaning guide covers descaling, the oven-cleaning guide covers baked-on grease, and the dishwasher-cleaning guide covers filters and hidden water paths.
A clean air fryer does not require harsh chemicals or aggressive scrubbing. Cool it, clear it, soak what can be soaked, wipe what must stay attached, dry it completely and replace damaged parts before cooking again.
Hero image: Samay9211, CC BY-SA 4.0, via Wikimedia Commons.
Sources
Frequently Asked Questions
Can you put an air-fryer basket in the dishwasher?
Only when your model's manual or care page says that the basket, drawer or crisper plate is dishwasher-safe. Parts vary by model, and hand-washing with a soft sponge is the safer default when the instructions are unclear.
How do you clean baked-on grease from an air fryer?
Let the removable parts soak in hot or warm soapy water until the residue softens, then use a soft sponge or cloth. Repeat the soak instead of using steel wool, a knife or another abrasive that could damage the coating.
Can you use oven cleaner inside an air fryer?
Do not use oven cleaner, bleach or another strong product unless the manufacturer specifically approves it for your model. Use mild dish soap on removable parts and a damp cloth inside the appliance, keeping liquid away from controls, vents and electrical components.
How often should you clean an air fryer?
Empty crumbs and wash food-contact parts after each use, especially after oily or saucy food. Wipe the interior and exterior when residue appears, and do a deeper heating-area inspection whenever smoke, odor or stubborn grease returns.