
Quick answer
To change a smoke alarm battery, first check the alarm label or manual for its battery type and whether it has a sealed 10-year battery. Remove it from the mount only if the model requires it, replace the battery with the specified type, close the battery compartment fully, then press Test. A continuing chirp can signal an end-of-life alarm rather than a battery problem.
Editorial note: This is general information, not professional advice. Check the linked sources and current local guidance before acting.
A chirp is not a reason to disable a smoke alarm. It is a prompt to identify which alarm you have and follow that model’s instructions. Battery types, mounts and warning sounds differ, and some current alarms have a sealed battery that is not meant to be replaced at all.
The U.S. Fire Administration recommends testing alarms monthly and replacing 9-volt batteries at least once a year. It also says smoke alarms should be replaced after 10 years. Those are useful household reminders, but the label and manual for the alarm in front of you decide the exact battery and procedure.
Start with the label, not the chirp
Before opening anything, look at the side or back of the alarm. You are trying to answer four questions:
| Look for | Why it changes the job |
|---|---|
| Model number | Lets you find the right manual if the label is brief. |
| Battery type | A 9-volt, AA, lithium or proprietary battery is not interchangeable. |
| Power type | Battery-only and hardwired alarms open differently; some wired models have a backup battery. |
| Manufacture or replace-by date | An old unit may need replacement, not another battery. |
Take a phone photo of the label before removing the alarm. It is an easy way to preserve the model number and battery orientation. If you manage a household safety list, add the date to your emergency plan rather than relying on memory.
First decide: replace the battery or the entire alarm?
Some alarms use a replaceable battery. Others have a sealed long-life battery, often described as a 10-year battery. Do not pry open or bypass a sealed unit to make it stop chirping. The National Fire Protection Association notes that a chirp continuing after battery replacement can mean the alarm has reached the end of its life and needs replacement.
Check the date and the manual before buying anything. If the alarm has a replace-by date, is around 10 years old, is visibly damaged, or gives an end-of-life signal described in its manual, replace the complete compatible alarm. Keep protection in place while you arrange that replacement.
Use this decision path before opening the alarm
| What the label or alarm tells you | Appropriate next step | Do not do |
|---|---|---|
| Replaceable battery and a clear model manual | Use only the battery type and access method in that manual, then press Test | Substitute a similar-looking battery or force the case open |
| Sealed 10-year battery or end-of-life signal | Replace the complete compatible alarm as the manufacturer directs | Pry open, bypass or disconnect the alarm to silence it |
| Hardwired unit with a battery compartment | Follow the model’s backup-battery instructions only | Disconnect, cut or alter household wiring |
| Damaged housing, connector, mount or inaccessible instructions | Keep the alarm powered if possible and arrange qualified help or replacement | Improvise a repair or leave the area without required protection |
| Actual alarm sound, smoke or fire concern | Follow the household escape plan and local emergency advice | Assume it is a battery chirp without checking safety first |
The USFA guidance supports annual replacement for 9-volt and hardwired-backup batteries, monthly tests, and replacement of alarms after 10 years. The specific sound pattern, battery access and mounting procedure remain manufacturer-specific.
A calm, model-first battery change
The exact steps vary, but this sequence avoids the common mistakes.
1. Get the specified battery first
Buy the chemistry and size printed inside the battery compartment or listed in the manual. Do not substitute a similar-looking battery or use an old battery from a drawer. Keep the packaging until the alarm passes its test.
If your alarm is hardwired, the backup battery still needs the specified type. Never touch wiring or open a wired connection just to change a battery; the battery door or rear compartment is usually the relevant part. If the instructions call for electrical work beyond that, use a qualified electrician.
2. Make access safe
Use a stable step stool or ladder on level ground. Ask another adult to steady the ladder if needed. Do not stand on a chair, countertop or rolling furniture. A fall while reaching a ceiling alarm is a worse problem than a short chirp.
For an alarm that can be reached from the floor, keep the work area clear and have the new battery ready. If you use a ladder, avoid carrying loose tools in your hands while climbing.
3. Remove the alarm only as the manual directs
Many alarms release with a short twist from the mounting ring; others use a latch. Some can stay mounted while you access the battery door. Do not force the case, pull on wires or cut a locking pin unless the manual specifically tells you to do so.
A hardwired unit may use a model-specific connector or mounting arrangement. If the connector or mount feels unfamiliar, stop and look up the model instructions; do not disconnect or alter wiring as part of a battery change.
4. Note the old battery orientation
Open the compartment and look for the plus and minus markings. Take another photo if the markings are hard to see. Remove the old battery and inspect the contacts only visually: corrosion, melted plastic or a loose contact is a reason to stop and replace the alarm or seek appropriate help, not to improvise a repair.
Recycle or dispose of the old battery according to local rules. Do not leave it within reach of children or pets.
5. Fit the new battery and close the door completely
Match the polarity marks exactly. Press the battery into its connector or tray without bending contacts. Then close the door until it clicks or sits flush.
Many alarms are designed so that they cannot be mounted correctly with an open battery door. That is a safety feature. Do not tape the door shut or force the alarm back onto the ring.
6. Return the alarm to its mount
Reattach it using the reverse of the manual’s removal process. For a hardwired model, use the seating and support procedure shown by the manufacturer. If the alarm will not seat securely, stop and arrange appropriate help rather than modifying the mount or wiring.
If you had to use a ladder, step down before testing. Testing from a stable position is safer and makes it easier to hear the sound.
7. Press Test and listen for the correct response
Use the Test button on the alarm itself. Hold it as long as the manual says—many models need more than a quick tap. A loud alarm indicates that the test circuit and power are responding; it does not replace following the manufacturer’s maintenance guidance.
The USFA recommends monthly testing. Choose a simple recurring reminder that suits your household. Pairing it with the monthly review in a home inventory can make the task more visible.
8. If it still chirps, troubleshoot without disabling it
First recheck the battery type, polarity, compartment latch and mounting. Then read the manual’s sound guide: a low-battery chirp, end-of-life signal, fault signal and interconnected-alarm alert can be different patterns.
Do not assume that a new battery solves every sound. Dust, a poorly seated battery, an end-of-life date or a different alarm elsewhere in the home can be the real cause. Identify which unit is making the sound before acting.
9. Check the rest of the home while you are there
A single repaired alarm is useful, but this is a good moment to identify every smoke alarm, note its date and press Test on each one. The USFA advises smoke alarms inside every sleeping room, outside each separate sleeping area and on every level of the home, including the basement. Local requirements can differ, especially for rentals, so use local rules and the building’s guidance as well.
For a rental, notify the landlord or property manager promptly about a failed, expired or hardwired alarm. Do not wait for a routine inspection.
10. Record the date and keep the alarm powered
Write the replacement date on a calendar or in a household note. Include the alarm location and the battery type if that saves a future search. Replace the complete alarm by its stated replacement date rather than treating batteries as a permanent repair.
Most importantly, do not leave an alarm disconnected overnight while waiting for a battery or a new unit. Restore its required power promptly and follow local emergency advice if an alarm indicates an actual fire.
A small routine beats a frantic fix
A smoke alarm is most useful when its maintenance is routine: check the label, keep the right battery available if the model needs one, test monthly and record dates. If a chirp persists after the correct battery is fitted, treat the manual and the unit’s age as evidence—not as an annoyance to silence.
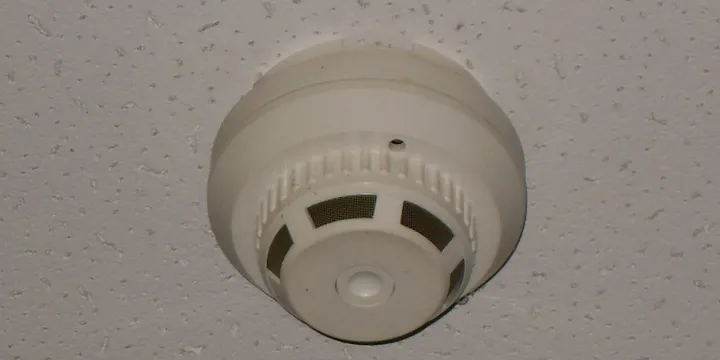
Hero image: National Institute of Standards and Technology, public domain, via Wikimedia Commons.
Sources
Frequently Asked Questions
How often should I replace a smoke alarm battery?
Follow the manufacturer instructions for the alarm in your home. The U.S. Fire Administration says to replace 9-volt smoke-alarm batteries at least annually, while alarms with sealed 10-year batteries are replaced as complete units at the end of their stated life.
Why does my smoke alarm still chirp after a new battery?
Check that the battery type and polarity match the label, the compartment is fully closed and the alarm has been tested according to its manual. A continuing chirp may mean the unit has reached its end of life; check the manufacture or replace-by date and the manual before silencing it.
Can I remove a chirping smoke alarm battery and deal with it later?
Do not leave a smoke alarm without its required power source. Use the alarm instructions to correct the problem promptly or replace the unit if it is at the end of its service life.
Do hardwired smoke alarms have batteries?
Many hardwired alarms have a backup battery, but designs vary. Read the label or manual for the exact model rather than assuming that mains wiring means no battery is present.


.jpg)