Quick answer
Walk through your home room by room and record each important possession with a description, brand, model or serial number, purchase details and a photo. Keep the inventory and supporting receipts in at least two secure places away from the home, then update it after major purchases and on a regular schedule.
A home inventory is not a list you make because you enjoy spreadsheets. It is a memory aid for the day you cannot safely walk through your home and look at everything you own. After a fire, burglary, flood or other covered loss, stress makes it surprisingly difficult to remember the contents of a drawer, closet or garage.
The useful version is a room-by-room record with photos, descriptions, model or serial numbers, purchase details and supporting documents. The National Association of Insurance Commissioners’ disaster-preparedness guidance says an inventory can help document belongings and assess whether coverage fits your situation. It does not guarantee that a policy covers every item, however. Limits, exclusions and claim rules vary, so treat this guide as a documentation system, not insurance advice.
1. Choose a system you will actually maintain
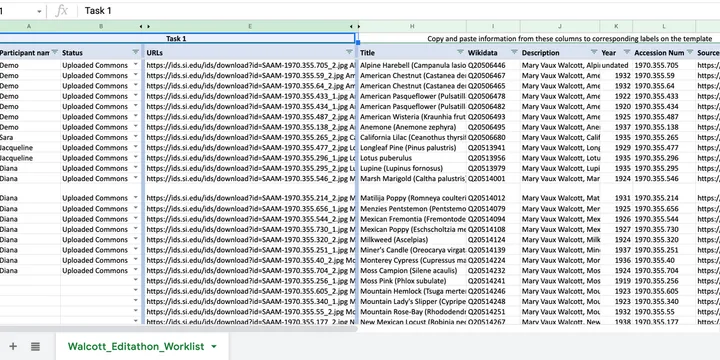
Start with the simplest format you can keep current: a spreadsheet, a dedicated inventory app, a notes document with photos, or a paper checklist that you later scan. A good record beats an impressive template that is abandoned after one room.
If you choose a spreadsheet, the spreadsheet guide explains the durable one-row-per-item structure, useful formulas and checks before you rely on the file.
Create these columns before you begin:
| Field | What to record |
|---|---|
| Location | Room, closet, garage or off-site storage |
| Item | Plain description, quantity and condition |
| Identifier | Brand, model, serial number or distinguishing mark |
| Money | Purchase date, price, receipt or appraisal |
| Evidence | Photo, video filename and supporting document |
Keep the file in a format you can export. If an app locks your information into an account or proprietary format, export a copy before you depend on it. For a broader record of the files and photos on your devices, the digital-photo organization guide uses a similar backup-first approach.
2. Start with one room, not the whole house
Choose the room where you spend the most time and finish it before expanding. Work clockwise from the door: surfaces, drawers, cupboards, closets and then the floor. This prevents the common mistake of recording only expensive electronics while forgetting clothes, cookware, books, tools and children’s belongings.
The California Department of Insurance Home Inventory Guide provides room-by-room prompts and also calls out less obvious areas such as extra closets, pantries, basements and attics. Use its categories as a completeness check, not as a requirement to copy its paper layout.
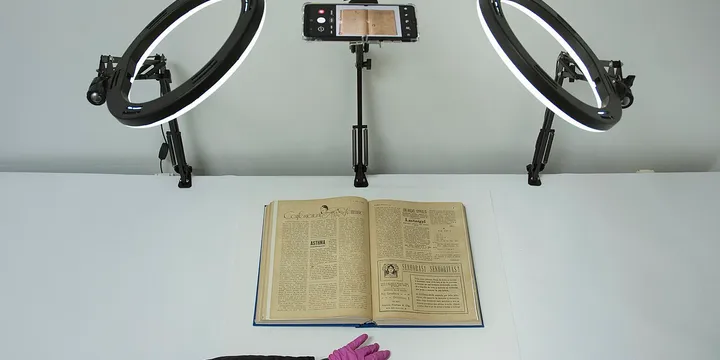
3. Make a quick video sweep before you catalogue details
Walk slowly through the room and record a wide shot of each wall, cupboard and open drawer. Narrate the room name and date, and pause over groups of belongings. This creates a visual index that can remind you what still needs a written entry.
Video is a useful first pass, not a complete inventory. A serial number may be unreadable, a small item may disappear in a crowded drawer, and a recording can be hard to search during a claim. The California guide recommends photos or video alongside descriptions and supporting documents; follow both parts.
4. Record the items that would be hardest to replace
For each meaningful item, write what it is in ordinary language rather than relying on a product category. “Black 55-inch television” is a start; brand, model, serial number, purchase date and room make it useful.
Record quantity for ordinary groups: six dining chairs, four winter coats, twelve power tools. For clothing, you do not need a line for every sock, but photograph wardrobes and record distinctive or high-value pieces. Do the same for kitchen equipment, furniture, musical instruments, sports gear, office equipment and outdoor items.
The goal is not perfect accounting. It is enough detail that another person could understand what was there and distinguish it from a cheaper or different replacement.
5. Capture model and serial numbers while you can
Photograph labels on appliances, computers, cameras, bicycles and other equipment. Add the number to the written record immediately if it is legible. For installed appliances, photograph the label before the machine is pushed back against a wall; for electronics, check the underside, rear panel or settings screen.
Do not guess a number. If a label is scratched or unreadable, write “not legible” and keep the photograph. A wrong identifier is less useful than an honest missing one.
6. Add receipts, purchase details and proof of value
Attach receipts when available, but do not stop because an old receipt is gone. If receipts are on paper, a phone document-scanning workflow can make a readable PDF before you file it. Record an approximate purchase date, where you bought the item and what you paid if you remember. Keep contracts, manuals, warranties and appraisals with the relevant entry.
FEMA’s guidance on documenting property recommends written descriptions with year, make and model numbers where appropriate, as well as photos or video. It also notes that an appraisal may help establish the value of a valuable item. Do not invent a value to make the list look complete; mark it for follow-up instead.
7. Handle valuables and collections as a separate review
Flag jewelry, art, antiques, collectibles, instruments, cameras, bicycles and specialist equipment. These items may need extra evidence, an appraisal or a conversation with your insurer. A home inventory can show what you own, but it does not change a policy’s limits or automatically provide special coverage.
Create a short “ask the insurer” list alongside the inventory: Are any categories capped? Does the policy use replacement cost or actual cash value? Are items in a storage unit, vehicle or home office treated differently? What documentation is required after a loss? Ask before you need to file a claim.
8. Include documents and belongings outside the main rooms
Check the garage, shed, attic, basement, balcony, vehicle, workplace locker and storage unit. Include spare appliances, tools, seasonal decorations, luggage, sports equipment and pet items. If something is kept elsewhere, record that location clearly. If the garage is too crowded to inspect safely, start with the garage decluttering guide before trying to catalogue every box and tool.
Keep a separate secure index of your insurer’s name, policy number, agent or claims phone number and the date you last reviewed the policy. Do not put passwords, full financial account credentials or identity documents into an ordinary shared spreadsheet; store sensitive records in an appropriately protected system.
9. Store copies where a disaster cannot take everything
A home inventory stored only on the computer inside the home fails at the moment it matters. Keep at least two accessible copies in different places, such as encrypted cloud storage and a trusted person’s secure storage, or a fire-resistant box plus an off-site digital copy.
FEMA recommends paper copies in a waterproof and fireproof box or safe, and electronic copies on protected removable or external storage. The California guide similarly recommends keeping records away from the home. For the wider question of protecting digital files, the 3-2-1 computer-backup guide explains why a second copy should be tested rather than merely assumed to exist. Test that you can open the backup, and label the export with its date.
10. Set a recurring update and a purchase rule
Add a new television, laptop, appliance, bicycle or other significant purchase when you bring it home, while the receipt and model label are easy to find. After that, review one room at a time on a recurring schedule. The California guide suggests reviewing an inventory three or four times a year; use that as a practical rhythm rather than a universal insurance requirement.
Also review after a move, renovation, inheritance, major gift or home-based business change. If the move is still ahead, the move-planning guide gives you a practical checklist for packing, address changes and closing out both homes. Remove items you no longer own, update damaged or repaired entries, and ask your insurer whether the change affects coverage. The NAIC’s homeowner-insurance guidance says a home inventory can be valuable when deciding how much coverage fits your situation.
A 20-minute starter plan
If a complete inventory feels too large, do this today:
- Create the spreadsheet or app and add the room names.
- Record and photograph your five hardest-to-replace items.
- Walk through the home and make one dated video sweep.
- Find your policy number and claims contact information.
- Export the record and store it in a second location.
Then finish one room per session. The best home inventory is not the longest one; it is the one that is understandable, backed up and updated before the next purchase.
Hero image: Andy Li, CC0, via Wikimedia Commons.
Sources
Frequently Asked Questions
What should be included in a home inventory?
Record the room or storage location, item description, brand, model or serial number when available, purchase date, price or current value, condition and a photo. Include belongings in closets, attics, basements, garages, vehicles, storage units and other off-site places where relevant.
What is the easiest way to make a home inventory?
Use a spreadsheet, inventory app or a narrated room-by-room video, but do not rely on video alone. Pair photos or video with written descriptions, identifiers and receipts, then export or back up the finished record.
Where should I keep my home inventory?
Keep a current copy somewhere you can access after a fire, theft or evacuation, such as encrypted cloud storage plus a trusted person or secure off-site location. A copy in the same house as the belongings is not enough.
How often should a home inventory be updated?
Add major purchases as soon as practical, review the record after renovations or moves, and choose a recurring review at least several times a year. California's guide suggests reviewing three or four times a year; your insurer may have different advice.