Quick answer
Put the page on a flat, contrasting surface, use even light, keep your phone parallel and capture every edge. On iPhone, Notes can scan documents; on Android, Google Drive can create a PDF. Crop and check each page, name the file clearly, save it where you can find it and share only the copy and access that the recipient needs.
You do not need a flatbed scanner for a receipt, signed form, rental document or school worksheet. A phone camera and the right scanning mode can turn a paper page into a readable PDF in a minute.
Scanning is more than photographing: the mode can detect the page, crop its edges and combine pages. Apple’s Notes scans on iPhone and iPad; Google Drive scans on Android and also documents an iPhone and iPad route, saving PDFs.
1. Decide what the file needs to do
Before opening the camera, decide whether you need a single image, a multi-page PDF, editable text or simply a readable copy. A receipt for your own records may only need one page. A signed contract usually needs every page in its original order. A form that someone else must edit may require a separate transcription or an actual editable document rather than a scan.
This prevents a common mistake: taking loose photos and discovering later that the recipient expected one PDF. For ordinary paperwork, aim for a clean, page-ordered PDF and keep the paper until the digital copy is complete.
2. Choose a trustworthy scanning method
Use a built-in feature first. On an iPhone or iPad, Apple’s document-scanning instructions use the Notes app: open a note or create one, tap the Attachment button and choose Scan Documents. On Android, Google Drive’s official workflow starts from the app’s Camera button and saves the result to Drive.
Google also documents scanning with Drive on iPhone and iPad. The menus may move as apps and operating systems change, so look for the current Scan Documents, Scan or camera option rather than following an old screenshot exactly.
Do not blindly install an old tutorial’s recommended app. Microsoft says Microsoft Lens was retired from iOS and Android, with new scanning ending after March 9, 2026, and recommends OneDrive as the alternative. If a guide tells you to begin with Lens, it is out of date.
3. Prepare the page and the surface
Put the document on a firm, flat surface that contrasts with its edges. A pale sheet is easier to detect on a darker table; a dark page is easier to detect on a light surface. Remove clips, sticky notes and anything that covers text unless it is part of the document.
Flatten curled corners gently. For a bound book or a page that cannot lie flat, accept that the result may need more manual cropping. Do not press hard on a fragile or valuable document just to make it look flat.
4. Set up even light
Turn off harsh reflections before capturing. Window light from the side can work well, but keep the phone or your head from casting a shadow over the page. Move a lamp, rotate the document or wait for a cloud if a glossy form has a bright stripe across its signature or small print.
Avoid flash on laminated pages. If the room is dim, add diffuse light rather than raising the phone so far away that the text becomes tiny. The goal is even brightness from corner to corner.
5. Clean the lens and frame every edge
Wipe the camera lens with a clean, soft cloth. A fingerprint can turn dark text into a hazy smear and make the app guess the page boundary incorrectly.
Hold the phone above the centre of the page and include a little space around all four edges. Do not crop away a page number, signature, stamp or handwritten note. A scanner can only preserve what the camera sees. If automatic edge detection draws a boundary through important content, adjust it manually before saving.
6. Keep the phone parallel to the page
A phone pointed at an angle makes the near edge look larger than the far edge. Keep the camera lens parallel to the document and move the whole phone instead of leaning it toward one corner. If the page does not fit, step back or use the normal camera view; do not pinch-zoom until the edges disappear.
Hold the device with two hands, or rest your wrists lightly on the table without touching the paper. Wait for the capture to finish. A sharp, slightly smaller page is more useful than a large frame with motion blur.
7. Capture and add pages in order
Open the scanning mode, wait for the page outline and capture the first sheet. Check the preview before turning the page. If the document has multiple pages, use the scanner’s Add, Keep Scanning or equivalent option so the pages stay together.
Keep the order obvious: title page first, then page two, page three and so on. For a double-sided document, scan the front and back as separate pages in the order a reader will need them. Do not assume that a stack or an auto-capture mode has preserved the sequence; review the thumbnails.
8. Crop, rotate and improve readability
Inspect each page at a useful zoom. Correct a tilted page, rotate a sideways capture and move the crop handles back to the true paper edge. Use a black-and-white or grayscale filter only when it improves legibility. A colour receipt, highlighted note or official stamp may need to remain in colour.
Do not use a filter to hide a bad capture. If a line is clipped, a corner is blurred or a shadow covers a number, retake the page. Editing cannot recreate information the camera never recorded.
For paper with faint pencil, coloured ink or a watermark, compare the enhanced preview with the original before saving. The most contrasty version is not always the most faithful one.
9. Save a real PDF with a useful name
Save the finished scan as a PDF when the recipient needs a document rather than a gallery image. Google’s mobile scanning guidance describes the Drive result as a PDF, and its Android help explains that scanned documents can be saved as searchable PDFs.
Use a name that answers three questions without opening the file:
2026-08-31-insurance-inventory-bedroom.pdfA good pattern is date-topic-person-or-property-version. Avoid names such as scan001.pdf, especially when you are collecting receipts, applications or property records. If the file contains personal information, check the destination before saving: a cloud folder, shared note and local device do not have the same access rules.
10. Verify before you send it
Open the saved PDF from the location where the recipient will get it. Check every page, not only the thumbnail:
- Is the first and last page present?
- Are all edges, signatures and page numbers visible?
- Can you read the smallest important text at normal zoom?
- Are pages upright and in the right order?
- Is the filename clear and the file type really PDF?
- Does the shared link require the recipient to request access?
For a form, compare the scan with the paper one last time. For a receipt or invoice, check dates, totals and account numbers character by character. If the document is sensitive, send only the necessary pages and use the recipient’s intended access setting. Never paste private documents into an unfamiliar scanner service for automatic text extraction.
A quick fix for common problems
- Crooked page: place it on a larger contrasting surface and keep the phone parallel.
- Dark corner: move the lamp or phone so your body is not blocking the light.
- Glare: turn off flash and rotate the page or light source slightly.
- Tiny text: move closer while keeping every edge visible, then retake in better light.
- Missing page: reopen the PDF and compare its page count with the paper stack.
- Blurry signature: brace the phone, clean the lens and capture again; do not sharpen a blurred original.
- Cannot find the file: search by the date and topic you used in the filename, then place future scans in one named folder.
A phone scanner works best as a small routine: prepare the page, control the light, stay parallel, capture every edge, review the pages and save a named PDF. The Google Drive organization guide covers a practical place to file and share that PDF, while the PDF guide covers export and final checks for documents from other sources. For better results with ordinary phone cameras, the phone photography guide covers focus, light and steady shooting. If the scan is part of a larger household record, the home inventory guide explains how to organise evidence and receipts, while the digital photo organisation system covers a safer file-and-backup habit.
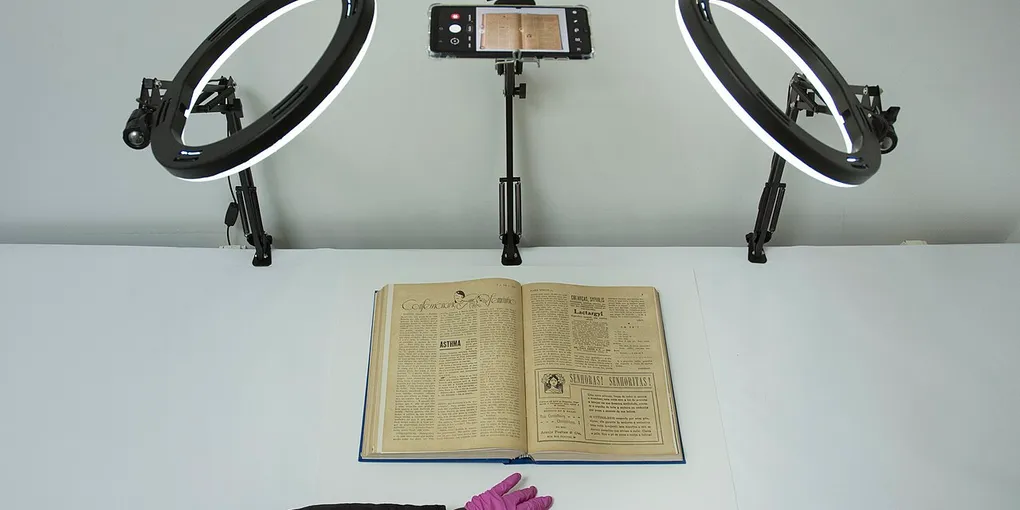
Hero image: Marcele de Oliveira Gonçalves, CC BY-SA 4.0, via Wikimedia Commons.
Sources
Frequently Asked Questions
How do I scan a document with my phone?
Place the page flat in even light, open a document-scanning feature, keep the phone parallel to the page and capture all four edges. Review the crop and text, add more pages if needed, save as a PDF and give the file a useful name.
Can I scan a document with an iPhone without an app?
Yes. Apple documents a built-in Notes workflow: open or create a note, tap the Attachment button, choose Scan Documents and capture the page. The exact buttons can vary with the iOS version and device.
How do I scan a document on Android?
Google Drive can scan documents from its Android app. Open Drive, tap Camera, point at the page, capture it, adjust the scan and save it. Google says the result is stored in Drive as a searchable PDF.
Why does my phone scan look blurry or crooked?
Use more even light, clean the camera lens, place the page on a flat surface, keep the phone parallel and hold it farther away so the whole page fits. Retake the page instead of trying to rescue a blurred image with editing.