Quick answer
Choose a level, sunny site near water, keep the bed narrow enough to reach its center without stepping into it, build a sturdy frame from suitable materials, and fill it with a tested garden-soil and compost mix. Leave paths around it, water deeply while plants establish, and maintain the bed without compacting the growing soil.
A raised garden bed gives you a defined growing space without asking you to improve an entire yard. It can make planting, weeding and harvesting easier, but the frame is only half the project. A bed that is too wide is hard to reach, a bed on a wet site drains poorly, and a bed filled with the wrong material can become an expensive box of disappointing soil.
This guide uses a simple, bottomless ground-level bed as the default. The University of Maryland Extension’s raised-bed guidance describes common beds as 2 to 4 feet wide and 2 to 12 inches high, with paths around them so gardeners do not compact the growing area by walking on it. If you are comparing a raised bed with containers or an in-ground garden, the first-time vegetable garden guide helps you choose the starting format before you build. Adapt the dimensions to your climate, soil, mobility needs and local building or material guidance.
1. Decide what the bed needs to grow
List the plants before you buy boards. Herbs and salad greens need less root depth than deep-rooted crops, while tomatoes need sturdy support and room around the plant. Decide whether you want one mixed bed, several small beds or a dedicated space for perennial herbs.
Also decide whether the bed is for food, flowers or both. Food-growing makes soil history especially important: a former industrial area, treated timber yard, busy roadside or unknown fill may need testing before you plant edible crops.
2. Choose a level, reachable site
Pick a spot with enough light for the plants you chose, a practical route for carrying soil and a hose or watering can nearby. Avoid a place where rain routinely pools. If the only possible site slopes, level it carefully or terrace it; the University of Maryland Extension notes that an ordinary raised bed does not work on a slope unless it is terraced.
Keep the bed away from tree roots when possible. Roots can compete for water and invade the growing mix, while overhanging branches can make the bed difficult to cover or maintain. Before digging, check your local guidance for underground utilities and any restrictions on structures near boundaries.
3. Draw the footprint and paths
Mark the outline with string, stakes or a hose. Walk around it and pretend to weed the far edge. If you cannot comfortably reach the middle from both sides, make the bed narrower rather than planning to stand inside it.
A 3-by-6-foot or 4-by-8-foot rectangle is easy to understand, but it is not a rule. A 2-by-4-foot bed may be better beside a wall, and two small beds can be easier to water than one large bed. Leave a firm path wide enough for your tools, wheelbarrow and body. The path is part of the design, not wasted space.
4. Select suitable frame materials
Common enclosure materials include stone, brick, concrete blocks, suitable wood boards and rigid recycled-plastic boards. The University of Maryland Extension lists these options and also notes that a raised bed can have sloped sides instead of a formal frame.
For a first wooden bed, choose straight boards and corrosion-resistant outdoor screws. Do not use salvaged timber with an unknown chemical history, peeling paint or visible contamination around food crops. If you use a manufactured or treated product, read its current instructions and local guidance for garden use rather than relying on an old label or a guess.
A bed with legs is a different structure: it must support the wet weight of soil, have drainage holes and stand securely. For mobility access, a shallower table-style planter can be more practical than filling a tall decorative box with heavy soil.
5. Gather tools and make a cut list
Penn State Extension’s construction lesson recommends preparing the design and site first, then gathering supplies such as wood, screws, a planting medium and appropriate protective equipment. For a basic frame, you may need:
- A tape measure, pencil and square
- A saw or a store-cut lumber list
- A drill and outdoor-rated screws
- Work gloves and eye protection
- A level, stakes and string
- A shovel, rake and wheelbarrow
- Garden soil or topsoil and mature compost
- A hose or watering can
Measure twice and write down every board length before cutting. A simple cut list reduces waste and makes it easier to compare the cost of boards, blocks and ready-made kits.
6. Prepare the ground and build the frame
Remove tall grass, rubbish and loose roots from the footprint. Level the surface enough that the frame sits firmly; it does not need to be perfectly engineered, but it should not rock or leave a large gap at one corner. Put the frame in place and check each side with the level.
For a wooden rectangle, pre-drill near board ends to reduce splitting, then fasten the corners with screws. Check that the diagonals are similar before tightening everything. For bricks or blocks, create a stable, level base and stack only as high as the material and design can safely support. The Texas A&M AgriLife Extension raised-bed publication treats planning, construction, planting and maintenance as one connected project; do not postpone drainage and access decisions until after the frame is full.
Do not add a solid bottom to an ordinary bed sitting on healthy ground. Open soil lets excess water drain and gives roots more room. If you are building over concrete, contaminated ground or a balcony, treat it as a container: provide deliberate drainage, choose an appropriate liner or barrier, and select plants for the available depth.
7. Check the soil before filling for food
If you are using soil already on the site, send a sample to a soil-testing laboratory. The University of Maryland Extension specifically recommends testing for lead when growing food in a raised bed. Testing is more useful than guessing from the soil’s colour or smell.
If the site history is uncertain and you cannot test promptly, use a clean barrier or choose a safer location rather than planting edible roots directly into questionable soil. Do not put unknown excavated fill into the bed just because it is free.
8. Fill with a balanced growing mix
Use garden soil or purchased topsoil mixed with compost. University of Maryland Extension gives a 1:2 or 1:1 compost-to-soil ratio as a practical starting point, depending on the materials available. Mix thoroughly enough that there is not a thin layer of compost sitting on top, but do not turn the bed into a bucket of pure compost.
Fill close to the top while leaving a small margin for watering and mulch. The soil will settle. Add material gradually if needed rather than building a high mound that washes over the path. If you are buying bulk soil, calculate the bed’s length, width and fill depth first and confirm what the supplier means by a cubic unit.
9. Plant with access and water in mind
Place tall plants where they will not shade everything else, and put trellises or cages in before roots fill the bed. Group plants with similar water needs. The indoor-herb guide covers a different light-and-container situation, while the container-vegetable guide can help when your bed is really a collection of pots. For tomatoes, see the tomato-growing guide for support, watering and harvest planning.
Water the new bed slowly so the mix settles without eroding a channel. Check moisture below the surface while plants establish; a dry crust does not always mean the whole root zone is dry. A layer of suitable mulch can reduce splash and evaporation, but keep it away from stems and follow local advice for the crop.
10. Protect the soil and maintain the bed
Never use the growing area as a walkway. Weed from the path, reach from both sides and use a board across a wide bed only when its load is safely supported and the soil will not be crushed. The point of the raised bed is to preserve loose, productive soil.
Raised beds can drain well and warm quickly, but the University of Maryland Extension also warns that they can dry out faster in hot, dry weather. Check the bed more often during heat, wind and the first weeks after planting. At the end of the season, remove diseased plant material, top up settled soil, repair loose corners and keep the paths clear.
For a low-cost reset, use the home composting guide to understand what finished compost can contribute, and add it as part of a balanced mix rather than treating compost as a complete substitute for soil. A good raised bed is not a one-time decoration: it is a small growing system that becomes easier to manage when its size, soil and maintenance routine match the way you actually garden.
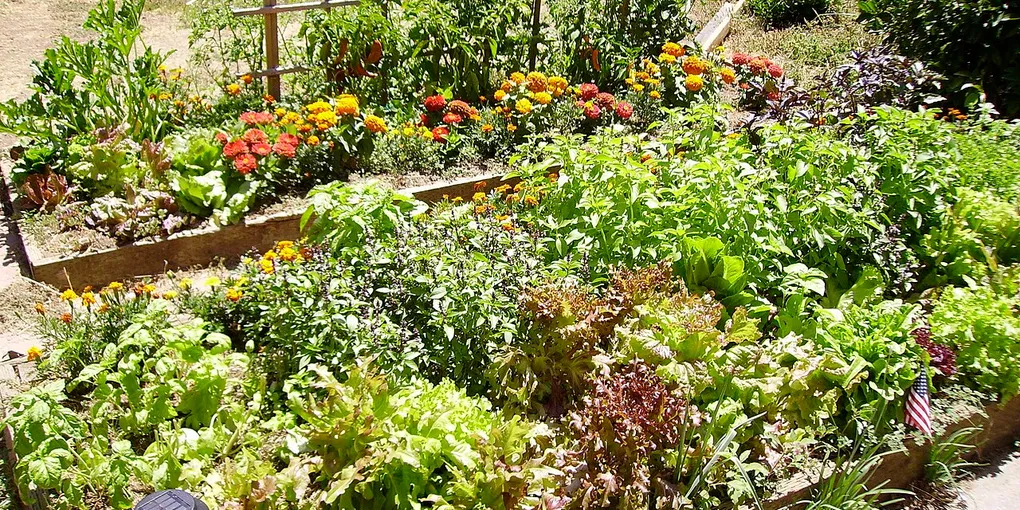
Hero image: Srl, CC BY-SA 3.0, via Wikimedia Commons.
Sources
Frequently Asked Questions
What is the best size for a raised garden bed?
Make the bed narrow enough that you can reach the center from a path without stepping on the soil. A width of 2 to 4 feet is a common starting range; choose the length to fit the site, and leave enough path space to work comfortably.
What is the cheapest way to build a raised garden bed?
Keep the design simple: a bottomless rectangle on level ground, with suitable boards, bricks or concrete blocks and a local soil-and-compost mix. Measure the site first, reuse sound materials when their history is known, and spend on good drainage and soil rather than decorative extras.
What soil should I use in a raised garden bed?
Use a mixture of garden soil or purchased topsoil and compost rather than filling the bed with pure compost. University of Maryland Extension gives a 1:2 or 1:1 compost-to-soil starting ratio; test existing soil and include a lead test when growing food if the site may be contaminated.
Should a raised garden bed have a bottom?
A bed placed on healthy soil usually does not need a solid bottom, because open ground allows drainage and root access. Use a bottom only for a specific reason, such as a container or a contaminated surface, and design drainage and depth for the plants you intend to grow.