How to Start a Vegetable Garden: 10 Steps for First-Time Growers
Quick answer
Start small, choose a level site with at least six hours of direct sun and easy access to water, then test and improve the soil before planting a few vegetables you will actually eat. Use your local planting calendar, water consistently, inspect for pests each week and keep notes so next season's garden is based on what worked.
Starting a vegetable garden is less about buying every seed packet and more about making the first season easy to maintain. A small, well-placed plot can produce more useful food than a large garden that becomes a weekend burden.
The University of Maryland Extension’s vegetable-garden guide recommends starting small, choosing a sunny site and growing things you like to eat. Use these ten steps to turn that advice into a garden you can actually keep up with.
1. Decide what the garden must do
Write down the outcome before you choose a layout. Are you trying to pick salad greens, grow tomatoes for summer meals, teach children where food comes from or reduce trips to the shop? Your answer determines the size, crops and amount of work.
List five vegetables or herbs you already eat, then mark the ones that are expensive, difficult to find fresh or especially satisfying when picked at home. The Royal Horticultural Society’s planning advice notes that growing more than you can store or eat can turn effort into waste.
Start with one small bed or three to five containers. You can expand after you have learned how quickly your site dries out and how much time harvesting takes.
2. Watch the site before you plant
Choose a fairly level place with at least six hours of direct sunlight each day. Watch it at different times rather than judging from one sunny morning: a tree, wall or building can cast afternoon shade. The Wisconsin Horticulture site-selection guide also recommends avoiding places where water puddles, rushes through during rain or collects in a low spot.
Check four practical details:
- Can you reach every part without stepping on the growing soil?
- Is there a tap or hose nearby?
- Does the site stay reasonably protected from strong wind?
- Can you see signs of deer, rabbits or other animals that may need a barrier?
Put paths into the plan now, even if they are only narrow strips of boards or mulch.
3. Choose ground, raised beds or containers
An in-ground bed is efficient when the existing soil drains well. A raised bed gives you more control over the growing mix and can make access easier. Containers work on a balcony, patio or small yard, but they dry out faster and need drainage holes.
If the ground is compacted, contaminated, badly drained or full of persistent roots, a raised bed or container can be a practical starting point. The University of Maryland guide covers in-ground gardens, raised beds and containers as different ways to begin.
Keep containers where their weight and runoff are acceptable. A balcony may need permission or a load check before you add many large, wet pots.
4. Test and prepare the soil
Before adding fertilizer, take a soil sample and use a reputable local laboratory or extension service. A test can show acidity and nutrient levels, helping you avoid adding lime or fertilizer that the garden does not need. The University of Maryland recommends testing vegetable-garden soil for nutrient levels, pH and whether it is safe to plant in the site.
Improve the bed according to the test and local recommendations. Remove grass and perennial weeds, loosen compacted soil and add mature organic matter when appropriate. The goal is soil that roots can enter, holds moisture without staying saturated and drains after rain.
Do not assume that a thick layer of fresh manure or a random fertilizer blend is an improvement. More is not automatically better, especially when you are growing food.
5. Make a short crop list
Choose fewer crops than your enthusiasm suggests. Easy first choices often include lettuce, radishes, beans, herbs and a cherry tomato, while the best choices still depend on your climate and available space. The University of Maryland’s crop-planning advice lists bush beans, tomatoes, cucumbers, peppers, lettuce, summer squash and leafy greens among useful starter options.
Separate cool-season and warm-season crops. A local nursery, seed packet or extension planting calendar can tell you when each crop belongs outside. Do not copy a planting date from a different climate just because the packet was sold in another country.
For a small trial, pick one leafy crop, one root or quick crop, one herb and one fruiting crop. That gives you variety without creating ten separate care routines.
6. Draw the layout before buying plants
Put the layout on paper. Give each crop enough room for its mature size, access for watering and a place to support plants that climb. Place taller crops where they will not shade shorter ones; the University of Maryland specifically recommends the north and west sides for taller plants in a typical garden layout.
Use the spacing on the seed packet or plant label as a starting point. Crowding may look efficient on planting day, but it makes watering, harvesting and disease inspection harder later. Leave a clear path to the back of the bed.
If you use containers, label each pot with the crop and planting date.
7. Plant by local timing, not impatience
Use your local planting calendar and the instructions for the specific variety. Some seeds can be sown directly; others are easier as transplants. Planting too early can expose seedlings to cold, while planting everything at once can create a harvest glut.
Sow a small second batch of fast crops when the first begins growing. This succession approach spreads the harvest and gives you a backup if weather, pests or a missed watering damages the first planting.
Keep the seed packets or take a photo of their instructions. Record the date, variety and location so you can compare results instead of relying on memory.
8. Water the root zone consistently
New seeds and young transplants need close attention because their small root systems dry quickly. Check the soil and plants, then water slowly enough to wet the root zone rather than just the surface. Adjust for rain, container size, soil type, wind and heat.
The Iowa State Extension planning guide treats water access as part of site planning, not an afterthought. That is a useful test: if moving a watering can to the garden feels annoying now, it will feel worse during a hot week.
Water at the soil surface when practical, keep leaves from staying wet overnight and use mulch only after the soil is warm enough for the crop. Containers may need checking daily in warm weather; a fixed schedule is less reliable than observing the soil.
9. Inspect, weed and support once a week
Set a weekly ten-minute garden check. Look underneath leaves, inspect new growth, pull small weeds before they seed and tie or support plants before they flop across a path. Also check for broken stems, chewed leaves, standing water and dry pots.
Identify a pest before reaching for a spray. A few holes do not always require treatment, and a product safe for one crop or pest may be wrong for another. Remove badly damaged leaves, use a barrier when appropriate and ask a local extension service or garden center when you are unsure.
Keep the bed tidy enough to see what is happening, but do not turn every imperfect leaf into an emergency. Regular observation is the important habit.
10. Harvest, record and improve the next bed
Harvest when the crop is ready for the use you planned. Pick leafy greens and herbs regularly, check beans and cucumbers often, and use the variety’s instructions for fruit size and maturity. Bring a bowl to the garden so picking takes less effort than leaving produce to overgrow.
At the end of the season, record what succeeded, what dried out, what you grew too much of and what you wished you had planted. The Iowa State Extension vegetable-garden planning resource includes layout, crop rotation, planting calendars and record keeping because a garden improves when you keep evidence.
If you reuse the same bed next year, rotate plant families where practical. The RHS explains that moving crop groups between areas can help reduce the buildup of some pests and diseases. For a small garden, do not force a complicated rotation: simply avoid planting the same demanding crop in exactly the same spot every season when you have an alternative.
A first vegetable garden should be modest: one sunny site, a short crop list, reliable water and a weekly check. Once that rhythm works, add a raised bed, trellis or container one improvement at a time. The guide to growing vegetables in pots is a natural next step for a patio garden, while the raised-bed guide covers construction when you are ready for more space.
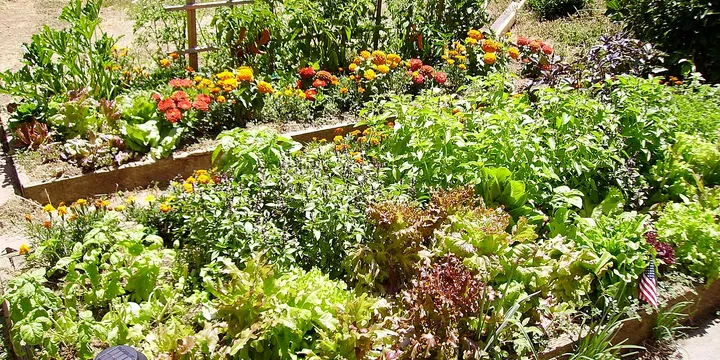
Hero image: Syced, CC0, via Wikimedia Commons.
Sources
Frequently Asked Questions
What is the easiest way to start a vegetable garden?
Begin with a small, sunny plot or a few containers, grow vegetables you already eat, and choose forgiving crops such as lettuce, beans, radishes or herbs. Prepare the soil, follow local planting dates and add more only after the first planting is manageable.
How much sun does a vegetable garden need?
Most vegetables do best with at least six hours of direct sunlight each day. Fruiting crops such as tomatoes and peppers usually need the brightest site; leafy crops can tolerate less sun, although growth may be slower.
Should I test my soil before planting vegetables?
Yes. A soil test can show nutrient levels and acidity, and it can flag whether a site needs a different approach before you grow food there. Use the test recommendations instead of adding large amounts of fertilizer or lime by guesswork.
How often should I water a vegetable garden?
Check the soil and plants regularly rather than following a fixed number of minutes. Water deeply when the root zone is drying, adjust for rain, soil and temperature, and use a local growing guide for crops that need different moisture.