Quick answer
Use Google Photos as a deliberate photo library: sign in to the right Google Account, turn on backup, wait for the app to say Backup complete, choose a storage quality, and organize finished trips or projects into albums. Verify backups before using Free up space, share albums with named people instead of public links, and archive items you want out of the main view rather than deleting them.
Google Photos works best when you treat it as a small library, not an endless camera roll. The useful routine is: back up deliberately, confirm that the copy exists, group photos when a project or trip deserves an album, and remove clutter without confusing archive, delete and free up space.
This guide is for a typical phone-and-computer setup. Google Photos menus can differ between Android, iPhone, iPad and the web. The exact buttons may also change, so use the official help page for your platform when a label does not match.
1. Choose the Google Account that owns the library
Before turning anything on, decide which Google Account should hold your photos. Your backed-up photos are private to you on signed-in devices unless you share them, and Google says you can back up to only one Google Account at a time. That makes the account choice more important than it first appears.
Check the profile picture or initial in Google Photos. If it is a work, school or shared account, confirm that you want personal photos there. A separate library can be easier to manage than moving years of images later.
If your main goal is a durable household archive, keep another independent copy of irreplaceable originals as well. The computer backup guide explains why one copy is not a complete backup plan.
2. Turn on backup and wait for confirmation
Open Google Photos, sign in, open the app settings and turn on Backup. Google’s backup instructions say that backed-up photos and videos can be accessed from any device signed in to the account.
Do not assume that seeing a thumbnail means the upload is finished. Look at the backup status and wait until it says Backup complete. Large libraries can take time, especially on a slow connection or when the phone is doing other work.
For the first upload, connect to reliable Wi-Fi and power. Leave the app open if your phone pauses background work aggressively. Test one recent photo from another signed-in device or from photos.google.com before you delete anything locally.
3. Decide which device folders belong in the library
The camera folder is not the only place where photos live. Screenshots, downloaded images, messaging-app media and edited exports may be in separate device folders. On Android, Google says the backup settings let you choose individual device folders.
Open Photos settings > Backup > Back up device folders and turn on only the folders that have lasting value. A useful starting set might include the camera and a dedicated scanned-documents folder. Avoid backing up every temporary download folder unless you genuinely need those files on every device.
For documents containing account numbers, identity details or private health information, consider whether a protected document system is more suitable than a general photo timeline. Your phone-scanning workflow covers naming and sharing scanned files with more care.
4. Pick a backup quality that matches your photos
Google currently describes three possible choices: Original quality, Storage saver and, in some regions, Express. Availability and settings can vary.
- Original quality keeps the captured resolution and counts toward Google Account storage.
- Storage saver compresses photos to save space; Google says photos above 16 MP are resized to 16 MP and videos above 1080p are resized to 1080p.
- Express, where available, uses more compression and lower resolution and is aimed at saving mobile data and storage.
Google’s backup-quality guidance says each Google Account comes with up to 15 GB of shared storage across services such as Photos, Drive and Gmail. Storage saver can be sensible for ordinary phone snapshots; Original quality is the safer choice when you regularly make large prints or edit the files later.
Do not change the setting casually on a nearly full account. Check how much space is available first, and remember that changing quality does not create an independent original copy.
5. Use search and the main Photos view for retrieval
A library is useful only when you can find something again. Give your photos enough context: keep the original date when possible, correct an obviously wrong date, and add a short description or location only when it will help future searches.
Do not try to build an album for every single day. Use the main timeline for ordinary snapshots and reserve albums for an outcome: 2026 coast trip, kitchen renovation, grandmother’s birthday or insurance inventory. That keeps your filing system small enough to maintain.
For a large cleanup, work in short sessions. Review one month, trip or device folder at a time instead of selecting thousands of photos while tired.
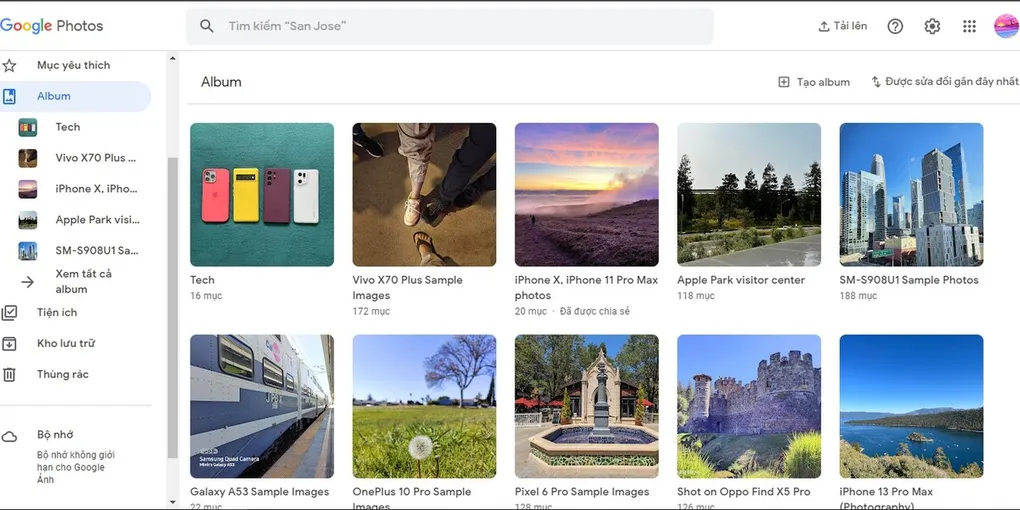
6. Create albums for trips, projects and sharing
On the web, Google’s album instructions describe selecting photos, choosing Add > Album > New album, adding a title and saving. You can also edit an album later, reorder items, add text or locations, and change its cover photo.
Use a name that answers what is this and when was it? “Trip” is weak; “2026-09 — Aarhus weekend” is findable. Keep one album focused on one event or purpose. If you need both a private working set and a family share, make two albums rather than exposing every draft photo.
Google says an album can contain up to 20,000 photos or videos, but a smaller album is easier for people to browse.
7. Archive clutter without deleting it
If a receipt, screenshot or duplicate is useful but makes the main Photos view noisy, archive it instead of deleting it. Google says archived items can still appear in albums, search results and device folders.
Archive is a visibility decision. It is not a backup and it is not a privacy boundary. Use it for material you may need again, then keep sensitive documents in a system with the access controls they require.
Before deleting, open the item and ask whether you are removing the library copy, a device copy or both. That pause prevents most cleanup mistakes.
8. Share the smallest useful set
For a family event or short project, select only the photos that solve the recipient’s need. Google’s sharing guidance says a shared album can be viewed and added to by people with access. A link is broader: anyone with the link can view the shared material.
Prefer named recipients when the photos are personal. Before sending, check the album title, selected items and audience. Remove people who no longer need access when a project ends, and remember that someone may already have downloaded or copied a photo before you changed sharing.
If recipients only need to view the result, do not give them editing access to a collaborative album. Send a finished selection or a copy instead.
9. Free phone space only after verifying backup
Google’s Free up space instructions are explicit: the feature deletes photos from the device. Before using it, confirm the backup status and test access from Google Photos or photos.google.com.
The normal flow is to open Google Photos, tap your profile picture or initial, choose Free up space on this device, review the amount and confirm. Items removed from the phone remain visible in your Google Photos library, but you may not see them in the phone’s built-in gallery or while offline.
This is different from tapping Trash on a photo. Google says deleting backed-up photos in Google Photos can remove them from devices with backup turned on and from albums. Use Free up space for verified local copies; use regular deletion only when you intend to remove the library item too.
10. Run a monthly library reset
Once a month, check the backup status, review new device folders, merge or rename albums that have become confusing, and remove accidental screenshots. Download or copy important originals before a major account change, phone replacement or storage cleanup.
Then inspect sharing: which albums are public by link, who still needs access, and whether the shared set contains a private photo that should be removed? Finally, check your Google Account storage because Photos, Drive and Gmail share that space.
A dependable Google Photos workflow is deliberately boring: one account, verified backups, a few meaningful albums, careful sharing and slow deletion. That gives you the convenience of a searchable cloud library without making one tap responsible for every copy of your memories.
Hero image: Meiko21 (talk), CC BY-SA 4.0, via Wikimedia Commons.
Sources
Frequently Asked Questions
How do I start using Google Photos?
Install or open Google Photos, sign in to the Google Account you want to use, and turn on Backup in Photos settings. Wait for the status to say Backup complete before treating the library as safe or removing local copies.
What is the difference between Original quality and Storage saver?
Original quality keeps the photo or video at the resolution you took it with and counts toward Google Account storage. Storage saver compresses photos and resizes photos over 16 MP, and it also counts toward storage. Choose based on how much you print, edit and need to preserve.
Will Google Photos delete photos from my phone?
The Free up space feature deletes local copies after backup, while the photos remain viewable in Google Photos and at photos.google.com. Regular deletion is different: deleting from Google Photos can also remove backed-up copies and device copies when backup is on.
Can I share a Google Photos album privately?
Yes. Share with named people when possible. A shared album lets people with access view the photos and add to the album, while anyone with a link can view link-shared photos, so review the audience before sending.