How to Set Up a Smart TV: 10 Steps for Streaming and Wi-Fi
Quick answer
Set up a smart TV by connecting power, pairing the remote, choosing home use, joining Wi-Fi or Ethernet, installing updates, and signing in only where the TV or official app asks. Finish by installing the streaming apps you use, testing playback, and changing privacy or parental settings before handing over the remote.
A new smart TV is not finished when it displays a picture. It still needs a safe physical setup, a network connection, current software, the right apps and a few decisions about accounts and settings. Do the work in that order and you avoid the most common loop: trying to troubleshoot an app before the TV has even finished updating.
The exact menu names vary by brand and operating system. Google TV supports phone-based QR setup or manual setup with the remote, while Roku’s guided setup walks through language, country, home use, network connection and account activation. Use the ten steps below as a platform-neutral path, then follow your TV’s on-screen instructions when they differ.
1. Identify the TV’s platform and model
Before removing every piece of packaging, find the model number and identify what is built in: Google TV, Roku TV, Samsung’s smart-TV platform, LG webOS, Fire TV or another system. The operating system determines which app store, account and remote instructions you will see.
Also decide whether you are setting up the TV itself or an external streaming player. A streaming stick or box needs its own power and an HDMI input; a smart TV with streaming built in does not need another box just to use its apps. Keep the quick-start guide nearby for model-specific ports and mounting instructions.
2. Choose a stable viewing position
Put the TV on its supplied stand or mount it only with hardware and instructions intended for that model. Leave room for ventilation and make sure the power cable cannot be pulled by children, pets or a passing foot. If the set is going on a wall, finish the mounting and cable routing before starting the software setup.
Place the remote, batteries and any voice-remote instructions where you can reach them. You may need the remote during the first boot even if the manufacturer offers a phone app later.
3. Connect power and other devices
Attach the power cable and connect the devices you actually use: a game console, soundbar, Blu-ray player, cable box or antenna. Use the port labels and the device manuals rather than guessing. An external streaming device belongs in an HDMI port, and its power arrangement may be separate from the TV’s power.
Turn on connected devices before the TV scans for them. If you get a blank screen later, the first checks are simple: is the source powered, is the cable fully inserted and is the TV on the matching HDMI input? Google TV and Roku both make input selection part of the setup path when an external device is involved.
4. Pair the remote and check the batteries
Insert the correct batteries or remove the pull tab from a rechargeable remote. Point it at the TV and follow the pairing prompt. Some remotes pair automatically; others use a button combination or an on-screen instruction specific to the model. Do not assume a remote from a different TV will control every setup screen.
If a voice remote fails, replace or charge it first, then retry pairing close to the TV. Once it works, test the directional buttons, Back, Home, volume and mute before continuing. Those basic controls are more useful during troubleshooting than a phone app that has not yet been connected.
5. Select language, region and home use
Choose the language and country carefully. Region settings can affect available apps, live-TV options and content terms. If the TV asks whether it is for home or store use, choose home use for a normal household; a store demonstration mode is designed for retail displays, not daily viewing.
Accessibility is worth checking now rather than later. Turn on captions, audio description, high contrast or a screen reader if someone in the household needs it. Google TV and Roku expose accessibility choices during setup, although the controls differ by platform.
6. Connect to Wi-Fi or Ethernet
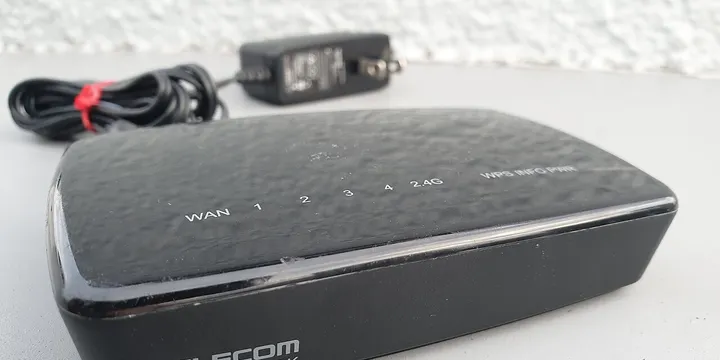
Select your home network and enter its password exactly. If the TV offers Ethernet and the router is close enough, a cable can make the initial setup more predictable. For Wi-Fi, do not hide the router behind the TV or place the set in a metal cabinet.
If you need to improve the network before connecting the TV, use the home Wi-Fi setup guide for router placement, security and guest-network decisions. A TV that connects but buffers may have a network problem rather than a streaming-app problem, so test the connection before installing ten apps.
7. Install system updates before customizing everything
Let the TV download and install its available software updates. Roku says its guided setup downloads the latest Roku OS updates after the network connection; other platforms may show a separate update prompt in Settings. Keep the TV powered until the update and restart finish.
Afterward, check the update screen once more and note the software version. This gives you a useful baseline if a remote, app or HDMI device behaves differently later. It is easier to troubleshoot a clean, current system before adding lots of accounts and personalized settings.
8. Sign in through the official setup flow
The TV platform may ask for an account, and individual streaming services may ask for separate accounts. Google TV can use a phone and QR code during setup, while Roku’s guided setup includes linking a Roku account. Samsung’s setup path also includes internet and Samsung-account choices.
Use only the screen, QR code or app named by the TV maker. Never type a password into a random activation page reached through a search ad or an unsolicited message. If entering long credentials with a remote is unpleasant, use the platform’s official phone setup or code-based sign-in when offered, then confirm that the account shown on the TV is the one you intended.
9. Install only the apps you will use
Open the TV’s official app store or app launcher and install a short list: perhaps one or two video services, music, weather or a local broadcaster. Search by the exact app name and check the publisher before installing a similarly named copy.
App availability depends on the TV model, operating system and region. Apple notes that the Apple TV app may need to be installed on a supported smart TV or streaming device, and that some devices do not support purchases inside the app. In that case, make purchases on a supported device and sign in on the TV to watch.
Move your frequent apps near the front, remove trial apps you do not want and avoid entering payment details until you understand which account will be billed.
10. Test playback and set the household defaults
Play a short video in each important app. Check picture, sound, subtitles, remote volume, pause/resume and Wi-Fi stability. Test the source button if you connected a console or disc player, and confirm that the soundbar or receiver receives audio from the intended input.
Now review the settings that affect daily use:
- Turn captions on or set their appearance if needed.
- Choose a picture mode that is comfortable in the room rather than blindly selecting the brightest mode.
- Set parental controls or a child profile before sharing the remote.
- Review voice, viewing and personalization settings and disable features you do not want.
- Remove saved accounts before giving the TV away or returning it.
For wireless headphones, speakers or a keyboard, the Bluetooth setup guide covers pairing and output selection without assuming that every TV uses the same menu.
Fix the common setup failures
The TV says there is no internet. Recheck the password, confirm another device can reach the network and restart the router and TV. Try Ethernet or a phone hotspot only as a diagnostic; a temporary connection is not necessarily a good permanent arrangement.
There is no picture from a console or streaming box. Select the HDMI input that matches the cable, wake the external device and reseat the cable. If only one source fails, troubleshoot that source and its cable rather than resetting the whole TV.
An app is missing. Check the TV model, region, software version and official app store. Some apps are not supported on older sets or every country. Use the service’s device-support page instead of downloading an unknown file.
The remote does not respond. Replace or charge its batteries, move close to the TV and repeat the model-specific pairing procedure. Keep the physical TV controls accessible until setup is complete.
A well-set-up smart TV is a small system, not just a screen: stable power, the right input, a working network, current software, deliberate accounts and only the apps you need. Record the model and software version, keep the remote instructions and revisit the privacy and account settings after the first week of normal use.
Hero image: LG전자, CC BY 2.0, via Wikimedia Commons.
Sources
Frequently Asked Questions
What do I need to set up a smart TV?
You need the TV and remote, a power outlet, your Wi-Fi name and password or an Ethernet connection, and the account details for the TV platform or streaming services you choose. Keep the model manual nearby because menus and supported apps vary.
Can I set up a smart TV without cable?
Yes. A smart TV can use an internet connection for streaming apps without a cable subscription. You can also connect an antenna, game console, disc player or other source if your TV and local service support it.
Why will my smart TV not connect to Wi-Fi?
Confirm the network name and password, move the TV or router closer for the initial setup, restart the network equipment, and try Ethernet if available. If other devices work but the TV does not, check for a software update and the TV maker's model-specific support.
Do I need an account to use a smart TV?
It depends on the platform and feature. Roku requires account activation for its TV experience, while individual apps may require their own accounts. You can often watch some free content without signing in, but use the official on-screen or phone-based setup flow rather than entering credentials on an unfamiliar page.