How to Remove Wallpaper: 10 Steps for Cleaner, Smoother Walls
Quick answer
Remove wallpaper by testing a small patch, protecting the room, peeling any loose layer, lightly scoring what remains, then softening the adhesive with a label-approved remover or carefully controlled steam. Scrape gently, wash away paste, let the wall dry fully, repair damage and prime before painting or hanging new paper.
Removing wallpaper is less about force than about giving the adhesive time to let go. The wrong scraper or too much water can damage drywall, plaster or the wall beneath.
The goal is to remove both the visible wallcovering and the adhesive underneath. The Benjamin Moore removal guide makes the same distinction: a wall that still has glue on it is not ready for a smooth coat of paint. Use the ten-step process below, but let a small test area—not a generic recipe—decide which method suits your wall.
1. Test a small patch before touching the whole room
Choose an inconspicuous area, ideally over a seam, and make a test patch about 2 by 2 feet. Try to lift a corner with a rounded putty knife. Note whether the surface peels in one sheet, separates into a decorative face and a paper backing, or refuses to move.
This test also reveals the wall beneath. Drywall needs lighter pressure than plaster, and several layers may need separate treatment. ROMAN recommends testing the removal process and waiting for the remover to work before judging the result.
2. Check for lead-paint and other stop points
Wallpaper removal can disturb paint or old surface coatings. In the United States, the EPA says a home built before 1978 may contain lead-based paint and recommends testing or hiring a certified lead inspector or risk assessor. If you cannot establish the age, treat the work area as potentially lead-painted and follow local lead-safe guidance.
For a pre-1978 project, a child-care space, a rental or a property being renovated for sale, check the rules that apply where you live before disturbing the wall. The EPA recommends lead-safe certified contractors for many renovation situations and publishes separate DIY containment and cleanup practices. If the wall has peeling paint or unknown coatings, stop before decorating. If you find visible mold or water damage, read the mold-removal guide before covering the wall.
Keep children, pets and anyone with breathing problems out of the work area until cleanup is complete.
3. Clear and protect the room
Remove wall hangings, curtains and as much furniture as possible; the decluttering guide can help if the room needs a wider reset. Move the remaining furniture to the centre and cover it. Put a waterproof drop cloth along the whole wall, not just under the section you are currently scraping. Tape or remove baseboard trim if the wallpaper runs behind it.
Remove outlet and switch covers only after switching off the relevant circuit at the electrical panel, and keep liquid away from the boxes. If you are not comfortable proving that a circuit is dead, leave the covers in place and protect them with tape and plastic instead. Turn off fans and reduce air movement so the remover does not dry before it has softened the paste.
For lead-risk work, the EPA also recommends sealing the area, covering floors and vents, removing soft items, keeping non-workers out and using dust-minimizing cleanup methods. Even a non-lead project benefits from this containment.
4. Peel any loose surface dry
Start at a seam, corner or switch opening with a rounded putty knife. If the top layer lifts easily, pull it slowly at a low angle rather than yanking it straight out from the wall. Large sheets are useful: fold them inward as you remove them and place them directly in a rubbish bag.
Some wallpaper is designed to peel, while vinyl-coated wallpaper may leave a thin paper backing behind. Do not keep pulling when the wall surface starts to come away with the paper. The aim is to remove the covering, not the drywall face.
If the paper tears into tiny pieces, change methods. Repeated dry scraping usually creates damage without doing useful work.
5. Score the remaining wallpaper lightly
Use a wallpaper scoring tool in light, circular passes over the area that will not peel. The point is to make small access holes for moisture or steam, not to cut grooves into the wall. Vinyl faces are especially likely to block a remover, so they need enough perforation for the treatment to reach the adhesive.
Press only as hard as necessary to mark the covering. ROMAN, Sherwin-Williams and Benjamin Moore all describe scoring as a way to help the remover penetrate; none requires carving into the substrate. Make a second test if you are unsure whether your pressure is too high.
Work in manageable sections—roughly a few feet wide—so the solution stays active while you scrape.
6. Choose one removal method and follow its instructions
There are three practical routes:
- Water-based or commercial remover: Use the product’s stated dilution, dwell time and ventilation instructions. A gel can be easier to keep on a vertical wall than a thin liquid.
- Steam: Fill the machine only as its manual directs, wait for it to heat, and treat the plate and hose as burn hazards. Sherwin-Williams advises working in small sections and using a scorer when steam cannot reach the adhesive.
- A simple warm-water test: Some papers release with warm water and a sponge, but do not assume water alone will handle old or strong paste.
Do not mix products or improvise a stronger chemical solution. Use gloves and eye protection when the label calls for them, keep the room ventilated and never leave a hot steamer unattended. The Sherwin-Williams guide describes vinegar and fabric-softener mixtures, but a commercial remover’s instructions should take priority.
7. Keep a small section wet while the adhesive softens
Apply the chosen remover with a sponge, spray bottle or pump sprayer, depending on the instructions. Saturate the wallpaper evenly without flooding the wall. Let it sit for the label’s full dwell time; many guides describe waiting around 10–15 minutes, but the product and wall condition decide the correct interval.
If the surface dries before you can scrape it, reapply to that small area. Scraping immediately is tempting, but it usually leaves more paste behind and increases the pressure needed. Start at a seam or edge once the paper feels soft and begins to wrinkle or release.
8. Scrape the paper and paste with light pressure
Hold a rounded scraper at a shallow angle and push under the softened paper. Let the remover do the work. If the scraper catches, wet the area again and wait rather than levering against the wall.
Scrape into a bucket or bin so wet paste does not dry on the floor. For stubborn sections, repeat scoring and treatment. A sharp blade may seem faster, but it can gouge drywall, cut plaster or leave a repair line that is more visible than the original wallpaper.
9. Wash away adhesive and let the wall dry
Apply the remover again to remaining glue, wait as directed and wipe or scrape it away. Sherwin-Williams recommends a warm-water-and-dish-soap wash for remaining adhesive, followed by clean water; Benjamin Moore likewise emphasizes removing invisible residue before priming.
Use damp—not dripping—sponges on drywall. Change the rinse water often and work from the top down. Do not close the room up while the wall is wet. Let the surface dry completely before sanding, filling or priming; lingering moisture can make a repair compound fail and can trap residue under the next finish.
For lead-risk work, follow the EPA’s wet-cleaning, HEPA-vacuum and waste-containment practices rather than dry sweeping.
10. Repair, prime and choose the next finish
Run your hand over the dry wall. Fill shallow nicks or torn areas with the appropriate joint compound, let it cure, sand gently and remove the dust. If the drywall face is badly torn, the wall is soft, or plaster has detached, stop patching blindly and get advice from a decorator or repair professional.
Prime the repaired and cleaned surface with a product suited to the substrate and your next finish. ROMAN recommends sealing or priming after the wall has been cleaned and repaired; Benjamin Moore also recommends priming before paint. If you plan to hang wallpaper again, use the sizing or primer recommended for that wallcovering so the next removal is easier.
Avoid painting directly over old wallpaper as a shortcut. It can preserve seams and texture, and the moisture in the paint may loosen paper that looked secure. A clean, dry, repaired and primed wall gives paint or new paper a more predictable surface.
Wallpaper removal rewards patience: test first, use the least aggressive method that works, keep the work area contained and stop before a stubborn patch becomes wall damage. If the room involves possible lead paint, mold, major water damage or extensive plaster failure, the safest next step is assessment—not a stronger scraper.
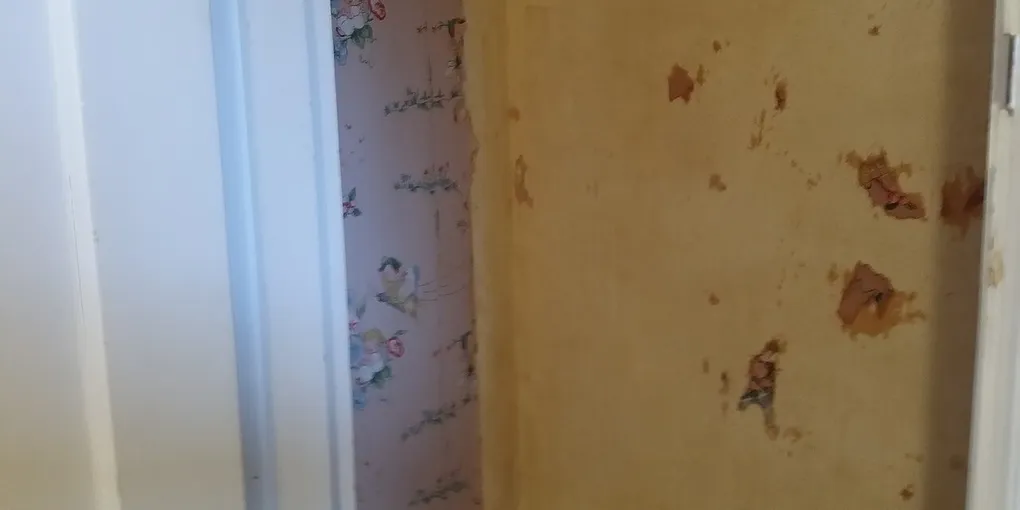
Hero image: Carl Nurmi, CC BY 3.0, via Wikimedia Commons.
Sources
Frequently Asked Questions
What is the easiest way to remove wallpaper?
Start with a small test patch. If the facing peels cleanly, continue dry; otherwise score it lightly and use a wallpaper remover or steamer according to the product or machine instructions. Work in small sections and keep the wall damp long enough to soften the adhesive, but do not flood drywall.
Can I remove wallpaper without damaging drywall?
Often, yes, if you use light pressure and a rounded scraper. Do not drive a scorer or sharp blade into the wall, and stop when the drywall paper starts lifting. A small test area tells you whether the adhesive, facing or wall surface is the weak point before you commit to the whole room.
Should I use a steamer or wallpaper remover?
Either can work. A steamer uses heat and moisture, while a remover softens the paste chemically; choose the method that matches the wallpaper and wall, follow the manufacturer instructions, and treat steam as a burn hazard. Scoring may be needed first when a vinyl face blocks penetration.
Can I paint directly over old wallpaper?
It is usually a poor shortcut. Seams, texture and loose edges can show through, and moisture from paint may loosen the paper. Remove the wallpaper when practical, clean the adhesive, repair the wall and use the primer recommended for the surface and your next finish.