How to Clean a Vacuum Cleaner: 10 Steps for Better Suction
Quick answer
Unplug the vacuum or remove its battery, then empty the bag or bin and clear the brush roll, hose and floor head. Clean or replace each filter only as the manual allows, let washable parts dry completely, wipe the body without flooding it, and test the vacuum after careful reassembly.
A vacuum cleaner can look tidy while losing suction inside the hose, filter compartment or floor head. Dust-packed filters restrict airflow, hair slows the brush roll, and a full bag or bin leaves less room for the machine to collect debris.
The safest approach is a dry, manual-first clean: identify the vacuum, disconnect its power, empty it, clear the airflow path, and only wash parts the manufacturer says are washable. The exact filter layout and brush access vary between upright, canister, cordless, handheld and robot models, so do not treat this guide as a replacement for the owner’s manual.
1. Identify the vacuum and gather supplies
Find the model number and keep the manual or manufacturer’s care page open. Note whether the vacuum uses a disposable bag, a reusable dust bin, washable filters, a replaceable HEPA filter, a belt, or a removable brush roll. A robot vacuum may also have side brushes, wheels, sensors and a charging dock that need separate care.
Gather a bin liner, soft cloths, a soft brush, scissors for cutting wrapped hair, mild dish soap if the manual permits it, and replacement bags or filters if needed. Gloves and a mask can make emptying dusty contents more comfortable. Do not buy a generic filter just because it looks similar; fit and filtration depend on the model.
2. Disconnect power before opening anything
Switch the vacuum off, unplug a corded model and remove the battery from a cordless model when the design allows it. Let a recently used machine cool before working near the motor or floor head. Hoover gives the same unplug-or-remove-the-battery sequence before troubleshooting a clog.
Move the vacuum to a clear, dry surface. Do not pull it by the cord, immerse the main body or spray cleaner into openings. If the cord, plug, battery or casing is damaged, stop at inspection and arrange the manufacturer’s repair route instead of cleaning around an electrical fault.
3. Empty the bag or dust bin
For a bagless vacuum, release the dust bin over a lined rubbish container and empty it before the debris reaches the fill line. WebMD recommends making this a habit after each use because an overfilled bin can restrict airflow and return dust to the room. Close the bin before carrying it back through the house.
If the vacuum uses a bag, replace it when full or when suction drops, following the manual’s removal method. Do not try to wash or reuse a disposable bag. Inspect the bin seal, bag collar and nearby gasket for packed dust; a poor seal can let debris bypass the intended airflow path.
4. Remove only the accessible parts
Take off the bin, wand, hose, floor head, brush roll cover and attachments that the manual identifies as removable. Photograph the arrangement if several seals or clips look alike. Keep screws and small brush caps in a cup rather than on the floor.
Separate dry debris from parts that may be washed. Do not force a stuck cover or twist a filter housing past its stop. A broken latch can create an air leak, and a damaged seal can make a clean vacuum perform worse than before.
5. Clean or replace the filters correctly
Start with the filter label and the manual, not with a bucket of water. Replace disposable filters. For a filter marked washable or rinsable, tap loose dust into the bin, rinse it using the instructed water temperature and leave it out until completely dry. Hoover advises at least 24 hours for a rinsable filter, while some designs require longer.
Do not wash a filter that the manual says to replace or clean dry. Consumer Reports specifically notes replacing a visibly dirty HEPA filter in its vacuum-maintenance guidance, and WebMD warns that reusable and disposable filters need different treatment. Never reinstall a damp filter: moisture can damage the vacuum or make dust cling inside the airflow path.
If there is more than one filter, clean or replace each one according to its own instructions. Mark the date on a replacement or keep a note in your phone so a filter does not quietly run far beyond its service interval.
6. Clear the hose, wand and air inlets
Hold the hose up to a light and look through it. Check both ends, the elbow near the bin, the wand, the floor-head inlet and any visible air channel. Remove loose debris by hand. For a deep obstruction, Hoover recommends a long, blunt object only when the hose design permits it; never stab through the hose or push a sharp tool toward a valve.
A clog may be more than a nuisance. It can make the motor work against restricted airflow and may trigger a thermal shutoff on some vacuums. If the machine stopped after sounding strained, let it cool, clear the obstruction and consult the manual before repeatedly switching it back on.
7. Cut hair and fibers from the brush roll
Turn the floor head over only after power is disconnected. Pull away visible hair, thread and carpet fibers. For wrapped strands, snip along the groove with scissors, keeping the blades away from bristles, belts and seals, then lift the pieces out instead of winding them tighter.
Spin the brush roll by hand if the design allows it. It should move as the manual describes, without a hard stop or grinding sound. Look at the belt, end caps and bearings for damage, but do not open a sealed head merely to reach them. Consumer Reports identifies wrapped hair and fibers on the brush roll as a common maintenance point and notes that a jam can contribute to belt problems.
If the brush roll is catching fibers from an area rug or its fringe, stop the vacuum and use the rug-cleaning guide for a gentler rug-specific approach rather than forcing the machine through the snag.
8. Wash approved bins, heads and attachments
Rinse a dust bin, brush or attachment only when the manual says it can be washed. Use lukewarm water and a small amount of mild soap, then rinse away residue. Avoid soaking motorized heads, electrical contacts, powered rollers, battery housings, sensors or sealed bearings.
A soft brush can loosen dust from crevice tools and upholstery nozzles. Wipe the inside of a floor head with a barely damp cloth rather than flooding it. For fabric or mattress tools, let every washable component dry fully before storage; the mattress-cleaning guide covers the separate surface-cleaning workflow.
9. Wipe the body and check robot-vacuum parts
Wipe the handle, casing, wheels and controls with a dry or barely damp cloth. Clean robot-vacuum sensors only as the manual directs, and remove hair from wheels and side brushes. Keep charging contacts dry and make sure the dock area is free of loose debris.
Do not spray cleaner onto the vacuum. Spray the cloth if the manual allows a cleaning solution, and keep liquid away from vents, switches and the motor. If your vacuum has a dirty-water or mop attachment, treat it as a separate appliance and follow its instructions rather than applying this dry-vacuum routine.
10. Dry, reassemble and test airflow
Leave washed filters, bins and attachments separated until they are completely dry. Reinstall the correct filter, seal, brush roll, belt cover, bin and hose in the order shown by the manual. Check that the bin clicks shut and that no gasket is folded.
Run a short test on a clear floor. Listen for a new rattle, smell, squeal or burning odor, and check that the brush roll and suction behave normally. If suction is still weak, repeat the simple checks: full bag or bin, clogged hose or nozzle, dirty filter, wrapped brush roll or loose connection. The washing-machine cleaning guide uses the same useful principle for appliances: clean the parts that collect residue, but do not flood the machine’s working body.
For routine care, empty the bin after each use, inspect the brush roll when hair is visible, and check filters and hoses when suction changes. Consumer Reports suggests a full system check every other month as a starting point, while heavier use calls for a shorter interval. A small dry clean before the vacuum struggles is easier than trying to recover performance after a deep clog.
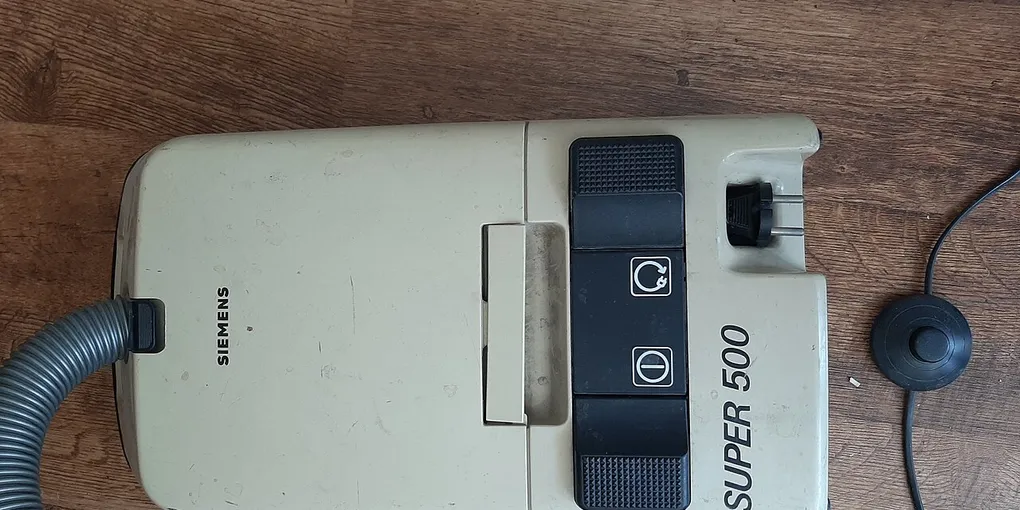
Hero image: Smiley.toerist, CC BY-SA 4.0, via Wikimedia Commons.
Sources
Frequently Asked Questions
How often should you clean a vacuum cleaner?
Empty a bagless bin after each use and deal with visible hair, clogs or a full bag promptly. A full system check every other month is a useful starting point, but homes with pets, dust or heavy use may need more frequent filter and brush-roll care. Always follow the model's manual.
Can you wash a vacuum cleaner filter?
Only if the manual identifies the filter as washable or rinsable. Disposable filters should be replaced, and a non-washable HEPA filter can be damaged by water. Rinse approved filters as directed and let them dry completely before reinstalling.
Why does my vacuum smell bad after cleaning?
Check for a full bag or bin, damp filter, trapped debris in the hose, hair on the brush roll and residue in the floor head. Let washable parts dry completely and replace a filter or bag that remains dirty or smells bad after the manual-approved cleaning.
How do you clean a vacuum that lost suction?
Empty the bag or bin, inspect the floor head and hose for clogs, check the filter, and look for hair wrapped around the brush roll. Unplug the machine before clearing it. If airflow is still weak or the motor sounds abnormal, use the manufacturer's troubleshooting or service route.