How to Organize a Refrigerator: A Safer Zone-by-Zone Layout
Quick answer
Organize a refrigerator by keeping ready-to-eat foods above raw meat, poultry and seafood, using the door for less temperature-sensitive items, separating produce in drawers, and labeling leftovers with a use-first date. Keep the refrigerator at or below 40°F (4°C), leave room for cold-air circulation, and follow the appliance manual for model-specific drawers and controls.
A refrigerator is easier to use when every shelf answers a simple question: what belongs here, and what needs to be used first? The goal is not a picture-perfect fridge. It is a layout that makes food visible, keeps raw items from dripping onto ready-to-eat food, and lets cold air move around the load.
The exact cold spots and drawer controls vary by appliance, so treat this as a safe starting layout rather than a universal law. Check the manual for your model, then use an appliance thermometer and adjust the zones around the temperatures you actually measure. The FDA’s food-storage guidance says to keep a refrigerator at or below 40°F (4°C), avoid crowding it, cover stored food, and clean spills promptly.
The practical refrigerator zone map
Before moving every item, use this map. It keeps the most important rule visible: raw foods should be separated from food that is ready to eat. Penn State Extension specifically recommends storing ready-to-eat foods above raw foods such as meat, while noting that home refrigerators do not all have the same shelf design.
| Area | Good starting use | Avoid putting here |
|---|---|---|
| Top shelf | Ready-to-eat food, cooked leftovers, opened foods you will use soon | Uncontained raw meat or leaking packages |
| Middle shelf | Dairy, prepared food, sealed meal components | Items hidden behind tall containers |
| Lowest shelf | Raw meat, poultry and seafood inside sealed packaging or a tray | Food that will be eaten without cooking |
| Crisper drawers | Produce, using the drawer labels and appliance guidance | Overfilled bags that block the drawer |
| Refrigerator door | Condiments and other less temperature-sensitive items | Milk, eggs or foods that need the steadiest cold |
| Front “use first” area | Dated leftovers, opened packages and food nearing its planned use | Food with no label or next-use plan |
Adapt the map to your manual and the temperatures you measure; drawer controls and cold spots vary by model.
1. Empty one section at a time
Do not leave the entire refrigerator open while you reorganize. Work in short sections, moving cold food to another cold area as needed.
Group items on the counter only long enough to sort them: ready-to-eat, raw, produce, dairy, condiments, leftovers and “not sure.” Throw away food that is visibly spoiled or that you cannot safely identify. Do not taste questionable food to decide whether it is safe; the FDA notes that foodborne illness may be present even when food does not look, smell or taste spoiled.
2. Check the temperature before choosing zones
Place an appliance thermometer where it can be read and check the refrigerator at or below 40°F (4°C). The FDA’s refrigerator-thermometer guidance explains why a freestanding thermometer is useful: the control dial often does not show the actual temperature.
If the temperature is too high, do not solve the problem by packing food more tightly. Confirm the door closes, check the model’s airflow requirements and leave space around vents. If the temperature remains unsafe, follow the manufacturer’s service guidance rather than trusting a new shelf arrangement to fix an appliance problem.
3. Leave paths for cold air
A full refrigerator is not automatically an efficient refrigerator. Keep vents, fan openings and rear-wall airflow clear according to the manual.
Choose containers that fit the shelf depth. One shallow, stackable container is often easier to scan than several deep bowls, but do not force a container into a spot that prevents the door from sealing. The best organizer is the one that lets you see the food without taking everything out.
4. Put raw proteins low and contained
Keep raw meat, poultry and seafood on the lowest practical shelf, sealed in the original package or a leak-resistant container. A tray adds a second boundary and makes a spill easier to clean. Penn State’s storage guidelines recommend putting ready-to-eat foods above raw foods to reduce the chance that drips contaminate them.
If the lowest shelf is a drawer, use the drawer only if it can contain the package and your appliance instructions allow it. Never place raw chicken or a leaking meat package above uncovered leftovers, washed fruit or a dessert.
5. Make ready-to-eat food easy to reach
Use the upper and middle shelves for food that can be eaten as it is: cooked leftovers, opened ready-to-eat packages, washed ingredients you are about to use and prepared lunch components. Keep these foods covered in containers or sealed bags.
Place the items you plan to eat soon toward the front. Keep tall jars and rarely used containers at the back or on a door shelf if they are suitable there. When a family member can see the leftover without moving four containers, the food is more likely to be used.
6. Treat the door as a convenience zone
The door is useful, but it is also exposed to repeated temperature changes. Use it for condiments, pickles, sauces and other items whose label or manufacturer guidance allows door storage. Keep milk in the main compartment rather than the door; GE Appliances gives the same practical warning because the main compartment helps dairy stay cooler.
Keep eggs in their carton inside the refrigerator, not in a door egg rack. The carton protects the eggs and keeps their identity and date information with them. For any specialty product, follow its label and the appliance manual instead of applying a generic door rule.
7. Use drawers for visibility, not storage overload
Crisper drawers are easiest to maintain when they are not stuffed to the point that food disappears. Keep produce in the drawer or location recommended by your appliance manual, and remember that not every fruit or vegetable benefits from refrigeration. If you are unsure, check the food’s storage directions rather than putting every item into the coldest available space.
Give each drawer one job, and inspect it during every weekly reset.
8. Create a dated “use first” lane
Reserve one small, visible area for food that should be considered first: leftovers, opened deli packages, cut produce and ingredients bought for a specific meal. Add the storage date to a removable label or piece of tape. A label does not make food safe forever; it simply turns a hidden item into a decision you can review.
Use the FDA’s storage guidance and food-specific storage charts for the actual limit. Refrigerate or freeze perishables within two hours, or within one hour when the air temperature is above 90°F (32°C). Divide a large batch into smaller covered containers so it cools more quickly, as the FDA’s thermometer guidance recommends.
9. Clean spills before they become a system
Wipe spills as soon as you see them, especially leaks from raw packages. Once a shelf is empty, wash it according to the appliance manual and dry it before replacing food. Do not mix cleaning chemicals inside the refrigerator, and never use a strong product on a surface unless the manufacturer says it is suitable.
Keep raw-food trays easy to remove. If a container leaks, take the whole tray out rather than wiping around the package and leaving the source behind.
10. Finish with a five-minute weekly reset
A refrigerator stays organized when the reset is small enough to repeat. Once a week:
- Move dated “use first” food to the front.
- Remove obvious spoilage and empty containers.
- Check for leaking raw packages and wipe any spill.
- Return items to their zones and clear blocked vents.
- Choose one meal that uses food already open.
If the same item keeps ending up in the wrong place, change the zone rather than blaming the person using the fridge. The layout should follow your real cooking pattern. Pair this system with the refrigerator-cleaning guide when shelves, drawers or gaskets need a deeper clean, and use the grocery-list guide to buy for the space you actually have.
A good refrigerator organization system is visible, safe and forgiving. Keep ready-to-eat food above raw food, keep the door for suitable items, leave room for airflow, label what needs attention and check the temperature. Everything else can be adjusted to fit your appliance and your household.
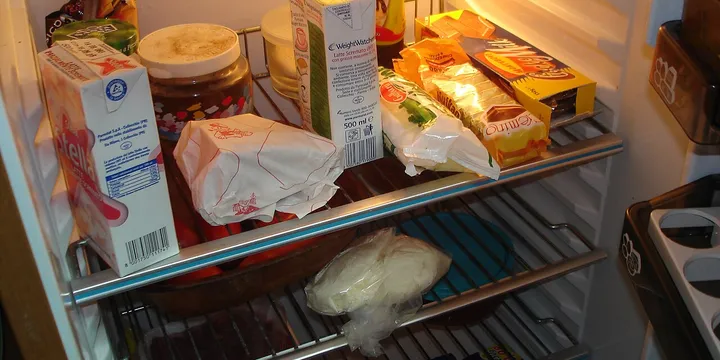
Hero image: USDAgov, public domain, via Wikimedia Commons.
Sources
Frequently Asked Questions
What shelf should raw meat go on in a refrigerator?
Keep raw meat, poultry and seafood sealed on the lowest practical shelf, preferably inside a tray that can catch leaks. Store ready-to-eat food above it so an accidental drip is less likely to reach food you will eat without cooking. Follow your refrigerator manual if its layout has a different safe-storage feature.
Should milk and eggs go in the refrigerator door?
Use the main refrigerator compartment for milk and keep eggs in their carton inside the refrigerator rather than on the door. The door is exposed to warmer temperature swings, so reserve it for items that are less temperature-sensitive, such as condiments, when your manual allows.
What temperature should a refrigerator be?
Keep the refrigerator at or below 40°F (4°C) and check it with an appliance thermometer rather than relying only on the control dial. Leave enough space for cold air to circulate and adjust the setting according to your model's instructions.
How do I organize leftovers so they do not get wasted?
Put leftovers in covered containers, label the date you stored them, and place the oldest safe-to-eat food in a clearly visible use-first area. Refrigerate perishables within two hours, or within one hour when the air temperature is above 90°F (32°C), and use the FDA's storage guidance for food-specific limits.


.jpg)