Quick answer
Turn the ceiling fan and light off, let hot parts cool, and cover the furniture underneath. Use a pillowcase or long-handled duster to catch loose dust, then wipe the blades and housing with a barely damp microfiber cloth and a mild cleaner approved for the finish. Never spray liquid onto the fan, bend the blades, or restore power until every part is dry.
A ceiling fan can collect a surprising layer of dust on the upper side of its blades. When you wipe it the wrong way, that dust falls onto the furniture, floor and your face. The cleanest method is a two-stage job: trap loose dust first, then use a small amount of moisture for grime.
This is a general surface-cleaning guide, not an installation or electrical-repair manual. Check the fan’s owner manual before removing a light globe, changing a filter, using a cleaner or working on an outdoor-rated model. For a broader room reset, the home decluttering guide can help you work from high surfaces down instead of cleaning the same area twice.
1. Choose a safe time to clean
Pick a time when the fan will not be needed for a while. Turn the fan and its light off, and let the light fixture cool completely. If the fan is controlled by a remote, wall switch or pull chain, use the control that prevents accidental starts; do not rely on a moving fan stopping by itself.
Gather an old pillowcase, microfiber cloths, a small amount of water, a mild cleaner that is suitable for the fan’s finish, a dry towel and a drop cloth or old sheet. You may also need an extendable duster or a properly sized stepladder. Keep children and pets away from the work area.
2. Make the area below the fan safe
Move delicate objects and cover furniture below the fan. A sheet catches falling dust, but it does not make an unstable ladder safe. If you use a ladder, place it on level footing, face the ladder while climbing and keep three points of contact. Those are among the ladder-safety measures in OSHA’s fall-prevention training guidance.
Do not stand on a chair, climb onto furniture or lean far to the side to reach the last blade. If the ceiling is high enough that you cannot clean while keeping a stable position, use a long-handled tool or hire someone who can work at that height safely.
3. Stop the fan from moving
Switch off the fan before bringing a cloth, duster or ladder near it. If you plan to remove a light globe, access a difficult housing or do anything beyond surface cleaning, isolate power according to the owner’s manual. Do not remove the canopy or motor cover for routine dusting.
Look over the fan before touching it. Cracked blades, loose screws, exposed wiring, a damaged pull chain or a light that has been overheating are reasons to stop and arrange qualified service. Cleaning is not the right time to test a suspected electrical fault.
4. Trap loose dust with a pillowcase
Start with dry cleaning. Slide an old pillowcase over one blade, supporting the blade rather than pulling down on it. Press the fabric gently against the top and bottom surfaces, then pull the case toward the tip so the dust stays inside. Empty the pillowcase outdoors or into a bin before repeating the process on the other blades.
Consumer Reports describes the pillowcase method as a way to remove dust and dirt from each blade without scattering it. It also describes a long-handled U-shaped brush that can wipe both sides at once. Choose the method that lets you reach the blade without stretching or twisting your body.
Do not spin the fan by hand to reach the next blade. Move the blades only as far as the fan’s design allows and keep your hands away from the motor, light and controls.
5. Dry-dust the brackets and upper housing
Once the blades are mostly clear, use a dry microfiber cloth or soft duster on the blade brackets, downrod and top of the motor housing. Work from the highest surface downward so anything that falls lands on an area you have not finished.
Use a vacuum with a soft brush attachment for dust around the ceiling canopy if you can hold it without pulling on the fan. Do not push the nozzle into openings or use the vacuum as a reason to climb higher than is safe. A short extension tool is better than an awkward reach.
6. Wipe greasy blades with a barely damp cloth
For marks that remain, dampen a microfiber cloth with water and wring it almost dry. Add a small amount of mild, finish-safe cleaner to the cloth if the fan manual permits it. Wipe one blade at a time, following the blade’s length rather than scrubbing across its edges.
Hunter Fan recommends turning the fan off, dusting with a pillowcase or microfiber cloth, and using a damp cloth with mild cleaner for grease or grime. Consumer Reports likewise warns against spraying liquid on the fan and against applying heavy pressure that could bend the blades.
Keep the cloth damp, not wet. Never spray the fan, ceiling, motor housing, light fixture or control directly. Do not mix cleaning products. If a finish discolors or feels tacky, stop and follow the manufacturer’s care instructions instead.
7. Clean both sides and the blade edges
Check the underside of every blade after cleaning the top. Wipe the leading edge, trailing edge and the area near the blade bracket, where dust can form a dark line. Use a separate clean section of the cloth for each blade if the dust is heavy.
Avoid soaking wood, fabric, painted or unfinished surfaces. A damp cloth followed by a dry cloth is safer than repeated wet wiping. Do not bend a blade to reach the top, and do not loosen blade screws unless the manual gives a removal procedure and you have safely isolated power.
8. Clean the motor housing and light fixture carefully
Wipe the outside of the motor housing with a dry or barely damp cloth. Keep liquid away from vents, seams, switches, sockets and any opening. For a light fixture or globe, wait until it is cool and follow the manual before removing it. If removal is allowed, support it with both hands, wash it as directed and let it dry completely before replacing it.
Do not open the motor housing for cleaning. Dust on the outside can be wiped away; wiring, bearings and internal components need a repair procedure, not a household spray. If the fan makes a new noise, smells hot or wobbles after cleaning, turn it off and arrange an inspection.
9. Wipe the remote, pull chain and controls
Use a dry microfiber cloth on pull chains and switches. Clean a remote with a cloth that is only slightly damp, keeping liquid away from buttons, battery doors and seams. Follow the remote or fan manual if it specifies a particular cleaner.
If the fan has a wall control, do not spray around the switch plate. Dust the outside only. Electrical controls should not be opened as part of a normal cleaning routine.
10. Dry, inspect and restore the room
Run a dry cloth over the blades and housing, then leave the fan off until every cleaned surface is dry. Remove the sheet carefully so it does not dump dust back onto the room. Wash the pillowcase and cloths separately from ordinary laundry if they collected heavy grime.
Before restoring power, check that the light globe, if removed, is seated correctly and that no cloth, cleaner or tool remains near the fan. Turn the fan on at its lowest setting while standing clear. Watch for wobbling, scraping, unusual noise or a loose-looking blade. Turn it off immediately if something seems wrong rather than trying to tighten parts while it is running.
Hunter Fan suggests cleaning a ceiling fan every two to three months as a practical maintenance interval. Treat that as a starting point, not a rule: a kitchen, workshop, smoking area, pet-heavy room or dusty renovation may need more frequent cleaning. A quick pillowcase pass at the start of the season is easier than waiting for a thick layer of grime.
Cleaning high surfaces is easier when you use the same top-to-bottom order elsewhere. The streak-free window-cleaning guide covers frames, glass and safe access, while the microwave-cleaning guide applies the same no-direct-spray caution to another electrical appliance.
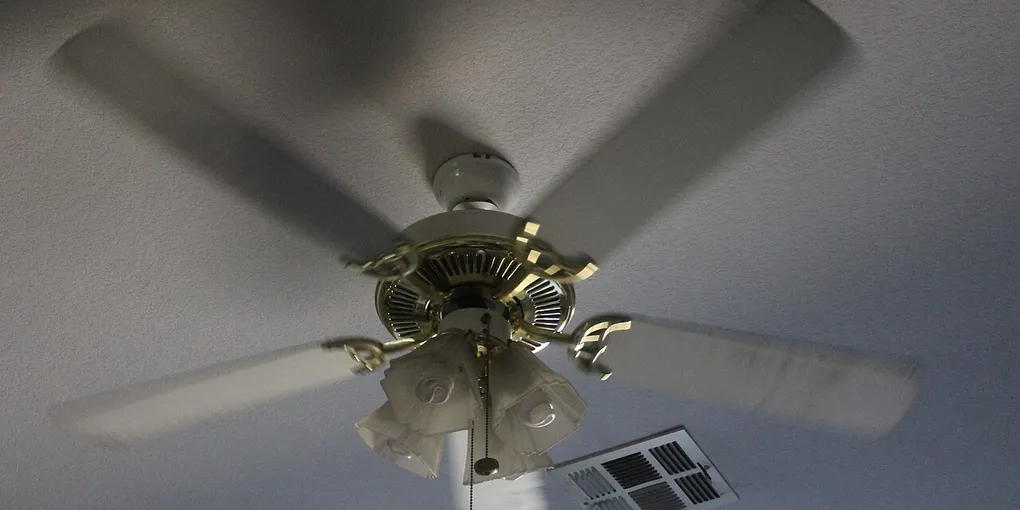
Hero image: Noah Wulf, CC BY-SA 4.0, via Wikimedia Commons.
Sources
Frequently Asked Questions
What is the easiest way to clean a ceiling fan?
Switch the fan off, cover the area below it, and slide a pillowcase over each blade to catch loose dust as you pull it back. Finish with a barely damp microfiber cloth and let the fan dry before turning it on.
How do you clean a ceiling fan without making a mess?
Use a pillowcase or a long-handled U-shaped duster to contain loose dust instead of brushing it into the room. Clean from the top of the fan downward, keep a drop cloth below it, and use very little liquid on the final wipe.
Can I spray cleaner directly on a ceiling fan?
No. Put a small amount of suitable cleaner on a cloth instead of spraying the blades, motor housing, light, switches or remote. Excess liquid can enter electrical parts or leave residue, and the finish may require a specific cleaner.
How often should I clean my ceiling fan?
Use the fan's environment as your guide: inspect it at the start of each cooling season and clean it when dust becomes visible, airflow changes or the blades look greasy. Hunter Fan gives every two to three months as a practical maintenance interval, but dusty rooms may need more frequent cleaning.