“Storage full” is the most common complaint about any smartphone. The phone slows down, the camera refuses to take one more photo, apps fail to update, and every screen comes with a red warning.
You do not need to buy a new phone or a bigger cloud plan. Most people can free up 10–20 GB in under an hour by working through this checklist. Here is how, step by step, on both iPhone and Android.
Step 1: Find out what is actually eating your storage
Do not guess — measure. The storage screen tells you exactly which categories to attack first.
- iPhone: Settings → General → iPhone Storage. The list shows how much space each app uses, and the bar at the top shows the split between photos, apps, media and “Other”.
- Android: Settings → Storage (or “Storage & memory”), or the files app’s storage view. Modern Androids also show a per-category breakdown.
Write down the three biggest categories. In almost every case they are photos and videos, a few heavyweight apps, and chat app media. That is where the next steps go — not into system files that you should never delete.
The safe order: measure, preview, verify, then delete
Use this four-minute checkpoint before you start removing anything:
- Measure: note the free-space number and the three largest categories. If the storage screen shows “System” or “Other” as the main category, do not start deleting random system folders; work through the visible app, media and downloads recommendations first.
- Preview: open the category or app that is taking space and select a few files by name and date. A thumbnail, download or chat attachment can be useful even when its filename looks disposable. Keep anything you cannot identify until you have checked it elsewhere.
- Verify: for photos and documents, open the cloud or computer copy in a separate browser or device. For app data, confirm that the service syncs what you need; an app’s purchase history does not necessarily mean that every offline file or draft is backed up.
- Delete in small batches: remove one category, return to the storage screen, and check the new free-space number. If something important disappears, stop before clearing another category and restore it from the service’s trash or recently deleted area.
On Android, Google’s official storage guide recommends Settings → Storage → Free up space and says Smart Storage is for backed-up photos and videos. On Samsung Galaxy devices, Samsung’s storage guide separates clearing an app’s cache from clearing its data. That distinction matters: Clear cache removes temporary files; Clear storage/data can reset local settings, downloads or sign-in state. If a menu label differs on your phone, use the storage screen’s preview and your manufacturer’s support instructions rather than guessing.
Step 2: Back up photos and videos, then let them leave the phone
Photos and videos are 70–90% of the storage on most phones. The solution is not to delete them — it is to back them up and stop keeping a full local copy.
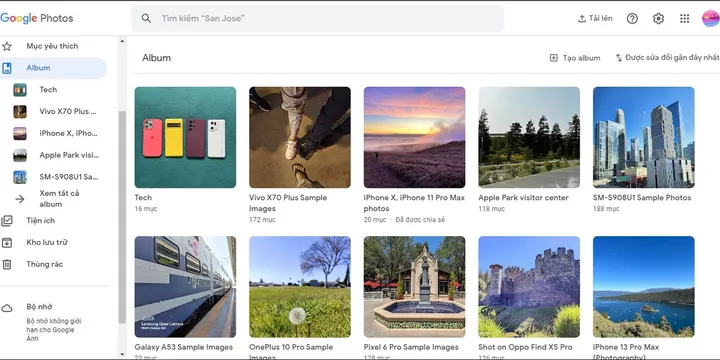
- Pick one service: Google Photos (free tier), iCloud Photos (Apple), OneDrive or Amazon Photos. Any of them works.
- Turn on “Back up and sync” and let the first backup run overnight on Wi-Fi.
- Update the storage settings so the originals live in the cloud and your phone keeps compressed versions: iPhone: Settings → Photos → Optimize iPhone Storage. Android: in Google Photos, Settings → Storage → “Free up device storage”.
- Only after the backup is verified in the service’s web view, delete the local photos.
One warning first: you can genuinely not notice slow, silent data loss. Until you have checked that the cloud copy opens correctly for a handful of recent photos and videos, do not delete anything. A backup you have never verified is not a backup.
Step 3: Clean out chat app media
WhatsApp, Telegram, Signal and iMessage are the quiet storage hogs. They download every photo, video and voice note you receive, and they never delete anything by default.
- WhatsApp: Settings → Storage & Data → Manage storage. The list shows exactly which conversations eat the most space, and you can clear media per chat, keeping text.
- Telegram: Settings → Storage Usage. There is a “Clear” option with a live preview of what stays.
- Signal: Settings → Storage → Manage Storage, same idea.
- iMessage: Settings → General → iPhone Storage shows how much messages use; you can also set “Keep messages” to 1 year instead of Forever.
Then turn OFF media auto-download (WhatsApp: Storage & Data → auto-download; Telegram: Settings → Data and Storage). From now on, only media you tap downloads.
Step 4: Delete the apps you never open
Open the storage screen from Step 1 and look at the app list — not by alphabetical order, but by size.
- Delete, do not just remove from home screen. Removing the icon from the home screen keeps the app and its data. Long-press → Delete/Uninstall removes it completely.
- iPhone’s “Offload App” is a compromise: it removes the app but keeps documents and data — perfect for apps you want to keep but use rarely (so re-install is quick). Use Delete for apps you will never open again.
- If you are paying for apps you no longer use, do the subscription audit before removing them, so the renewal does not silently continue.
Step 5: Clear cache and temporary files
Cache is the dump where apps store thumbnails, downloaded code and other leftovers. It grows silently and is safe to clear — the app rebuilds it.
- Android: Settings → Apps (or Storage) → pick an app → Storage → Clear cache. Use “Clear cache”, not “Clear storage” — clearing storage also deletes logins and settings.
- iPhone: there is no per-app cache button. Instead: force-quit heavy apps, and let iOS manage cache through the storage screen’s review suggestions. Clearing browser cache (Safari → Settings → Safari → Clear History and Website Data) recovers a chunk too.
Step 6: Empty the Downloads folder and offline content
Files apps fill up with PDFs, installers, screenshots and downloaded documents. And streaming apps quietly cache hours of video.
- Files (iPhone) and Files by Google (Android): sort by size, delete anything you no longer need, then check the recycle bin.
- Netflix/Disney+/Spotify: Settings → Downloads — delete everything you have already watched or listened to.
- Screenshots: take a habit. At the end of each month, open the Screenshots album, keep what matters, delete the rest.
Step 7: Move media to an SD card (Android only)
If your Android phone takes a microSD card, move photos, videos and downloads onto it:
- Insert the card, format it if asked to, then in Files by Google go to Storage → Internal → move items.
- Tell your camera and downloads app to save to the SD card by default.
- Keep important local files on internal storage as well — SD cards are slower and less reliable long-term, so treat them as extension, not as the only copy.
iPhones do not take SD cards. Do not use those “USB storage sticks for iPhone” as a primary hoarding strategy — the cloud approach in Step 2 is the cleaner answer.
Step 8: Take stock of what you actually want on the phone
This is not so much a step as the mindset behind the rest: a phone is a tool for the tools you use. The universal device access guide covers trimming your setup to a core set of apps that works across all your devices — the fewer apps you keep, the less storage (and attention) they demand. And if the time you spend in those apps is the real problem, the digital detox plan pairs well with a leaner app shelf.
Step 9: Turn on automatic cleanup
Let the phone do this for you from now on:
- iPhone: Settings → App Store → enable “Offload Unused Apps”, and check the recommendations on the iPhone Storage screen.
- Android: enable Smart Storage (Settings → Storage) for automatic deletion of backed-up photos and old downloads, and turn off “Download files automatically” where offered.
Step 10: Set a monthly reminder
Storage creeps back. Put a 15-minute reminder in your calendar for the first Sunday of each month: check the storage screen, clear chat media, empty downloads. Fifteen minutes a month beats an hour of panic every few months.
Quick wins checklist
- Checked the storage screen — do you know your three biggest categories?
- Photos backed up and verified in the cloud
- “Optimize/Free up device storage” turned on
- Chat app media cleared and auto-download off
- Unused apps deleted (not just hidden)
- Cache cleared on Android, browser cache on iPhone
- Download folder + offline streaming content emptied
- Monthly reminder set
Clearing storage is not about losing your data — it is about keeping only what you actually use, and keeping what matters in a safe place. Do the ten steps once, and “Storage Full” becomes a problem you hear about on other people’s phones.
Hero image: mikemacmarketing, CC BY 2.0, via Wikimedia Commons.