How to Clean a Dryer Vent: 10 Steps for Safer, Faster Drying
Quick answer
Unplug and cool the dryer, clean the lint screen and housing, disconnect the exhaust duct, then vacuum or brush only the accessible vent path from the dryer and outside ends. Reconnect the duct, confirm the outside flap opens and airflow is strong, and use a qualified professional for a roof route, damaged duct, inaccessible buildup or gas-appliance service.
Editorial note: This is general information, not professional advice. Check the linked sources and current local guidance before acting.
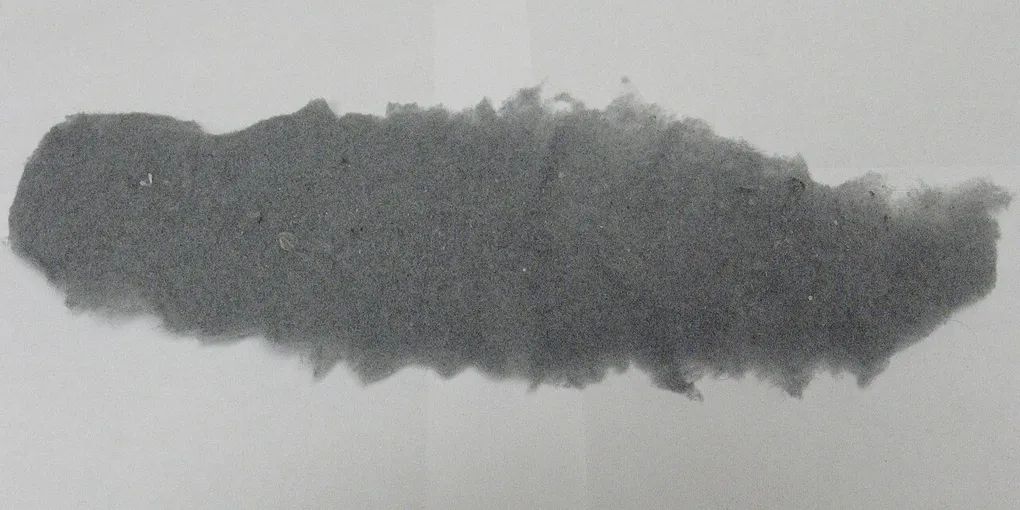
A dryer can finish a normal load while lint quietly collects behind the lint screen, around the dryer outlet and inside the exhaust path. That buildup restricts airflow, extends drying time and can create dangerous heat. The U.S. Consumer Product Safety Commission explains that lint in the dryer or exhaust duct can block air and contribute to heat buildup and fire.
This is a maintenance guide, not permission to dismantle an appliance or climb onto a roof. Start with your owner’s manual. Vent paths, gas connections, heat-pump systems, exterior hoods and access panels differ. If you cannot isolate the machine, reach the duct safely or reconnect it correctly, use a qualified appliance or vent professional.
First choose the safe scope of the job
| What you can confirm | Appropriate scope | Stop and arrange qualified help when |
|---|---|---|
| A short, accessible transition duct and outside hood | Clean only the reachable lint screen, housing, duct ends and exterior cover | The duct is crushed, torn, concealed or cannot be reconnected confidently |
| A long, concealed, attic, crawl-space or roof route | Inspect only from safe accessible points | Reaching the route would require opening finishes, entering unsafe spaces or climbing to a roof |
| A gas dryer | Follow the model manual and leave the gas connection untouched | You smell gas, see damage, or must disturb the gas line to access the duct |
| Weak airflow after accessible cleaning | Stop running loads and document the symptom | The flap stays shut, the warning returns, or the dryer becomes unusually hot |
| Lint behind fixed dryer panels | Keep to user-serviceable areas | Cleaning would require opening the dryer chassis or reaching live electrical components |
The USFA and CPSC support cleaning the lint screen, checking the exhaust path and outside airflow, and using qualified service for the dryer’s internal chassis. This table is a safety boundary, not a substitute for the model’s installation manual or local code.
1. Map the vent and read the manual
Find the dryer’s model number and look up its cleaning and installation instructions. Before moving anything, identify whether the machine vents through a wall, floor, crawl space, attic or roof. Note every accessible connection and the location of the outside hood.
A short straight duct is a different job from a long concealed run with several turns. The manual may specify the approved duct material, maximum route, clearance and cleaning method. Do not copy a brush size, chemical or disassembly step from another brand.
2. Cool and isolate the dryer
Stop the dryer and wait until the drum and surrounding surfaces are cool. Unplug an electric dryer before reaching behind it. For a gas dryer, follow the manual’s shutoff procedure and do not disturb the gas line; arrange qualified service if you smell gas, see a damaged connection or cannot isolate the appliance safely.
Wear gloves and keep a vacuum, soft brush, flashlight and towels nearby. Move the dryer only as far as needed, without crushing the duct or straining the cord, gas line or vent connection.
3. Clean the lint screen and its housing
Remove the lint screen and clear both sides over a bin. If the screen has a waxy film from dryer sheets or fabric softener, wash it according to the manufacturer’s instructions and let it dry fully before replacing it. Do not operate the dryer without the screen installed.
Shine a flashlight into the screen slot. Use a narrow lint brush or a vacuum crevice tool only as far as it can reach without forcing it. Lint that has fallen deep into the machine, wrapped around an internal component or collected behind a fixed panel is a service job—not a reason to insert a metal object.
The U.S. Fire Administration’s dryer-safety flyer recommends cleaning the lint filter before and after each cycle and cleaning lint from the back of the dryer.
4. Inspect the transition duct behind the dryer
Pull the dryer forward enough to see the short duct between the appliance and the wall. Look for crushed sections, sharp kinks, holes, loose clamps, heavy lint or a duct pressed tightly against the wall.
The CPSC advises replacing plastic or foil accordion-style ducting with rigid or corrugated semi-rigid metal ducting because flexible plastic and foil can trap lint and be crushed or kinked. Treat that as an installation decision: use the material and connection allowed by your dryer and local code, and call a professional if the existing duct needs replacement.
5. Disconnect the exhaust duct safely
With power isolated, loosen the clamp at the dryer outlet and separate the duct without tearing it. Keep the opening pointed upward or cover it briefly so loose lint does not fall into the appliance. Do not remove the dryer cabinet, heating assembly or motor panel to chase lint.
If the duct is brittle, badly crushed, inaccessible or attached to a gas appliance in a way you cannot safely handle, stop here. A professional can clean or replace the route without turning a routine maintenance task into an electrical, gas or fire hazard.
6. Clean the accessible duct from the dryer end
Use a vacuum hose and a dryer-vent brush sized for the duct. Work gently, collecting lint rather than compacting it farther into the wall. If the route is short and straight, vacuuming the duct and the dryer outlet may be enough; GE’s exhaust-duct guidance specifically describes disconnecting the duct, vacuuming it with a hose attachment and reconnecting it.
For a longer run, do not assume a homeowner brush is safe or effective around turns or concealed ductwork. Use a qualified vent professional if a reachable method cannot remove lint without force. Never use water, a flammable solvent or an improvised spinning tool inside the exhaust path.
7. Clean and inspect the outside hood
Go outside and find the dryer exhaust hood. With the dryer off, remove loose lint from the cover and look for a bird, rodent or insect nest, leaves, snow or another obstruction. Do not reach into a deep opening or disturb wildlife; use local pest or vent service when needed.
The flap should move freely. The USFA guidance says to check that the outdoor vent covering opens when the dryer operates. A stuck flap, damaged hood or gap around the duct can allow debris, pests or moisture into the route.
If the outlet is on a roof, behind a high wall or otherwise unsafe to reach, do not climb or lean from a window for this job. A vent professional has the equipment to inspect and clean it safely.
8. Reconnect the duct without crushing it
Reconnect the duct at the dryer and wall or floor connection using the approved clamp or fitting. Check that the route is as short and smooth as the installation allows, with no sharp collapse behind the machine. The connection must be secure before the dryer runs.
The CPSC specifically warns users to reconnect the ducting to both the dryer and outside vent before using the appliance again. Do not leave a loose hose exhausting lint and moisture into a laundry room, crawl space, attic or garage.
Push the dryer back carefully while watching the duct. Leave the clearance required by the manual. A duct that looks fine while the dryer is pulled out can become crushed as the appliance returns to the wall.
9. Test airflow and drying performance
Run the empty dryer for a few minutes on the setting your manual permits. Outside, confirm that the flap opens and that warm air moves through the hood. Keep hands, clothing and tools away from the opening and do not block it while testing.
Then dry a small, ordinary load and compare the result with your usual drying time. Whirlpool notes that a clogged exhaust system can slow moist air leaving the dryer and extend drying time. Use this symptom table as a first check:
| Symptom | First check |
|---|---|
| Clothes stay damp | Lint screen, crushed transition duct and outside airflow |
| Drying takes longer | Duct restriction, blocked hood or overloaded drum |
| Weak outside airflow | Loose connection, lint buildup, nest or damaged hood |
| Dryer is unusually hot | Stop using it and arrange a vent or appliance inspection |
| Warning returns | Follow the model’s check-vent procedure; do not keep resetting it |
If airflow remains weak after the accessible path is clean, stop using the dryer until the route and appliance can be assessed. The blockage may be deeper in the wall or roof route, or the appliance may have another fault.
10. Set a maintenance rhythm and know when to stop
Clean the lint screen before and after each load. Keep the floor and the area behind the dryer free of lint and clutter. The USFA recommends checking the venting for damage, crushing or restriction, and GE recommends inspecting and cleaning the exhaust duct at least once a year. A long, concealed or heavily used route may need professional attention more often; use the manual and the observed airflow as your guide.
Arrange qualified service when lint returns quickly, a check-vent warning persists, the duct is damaged, the route is concealed or roof-mounted, the dryer smells of burning, the cabinet overheats, or the appliance has a gas, electrical or mechanical problem. Also take extra care with clothing contaminated by gasoline, cooking oil, cleaning agents or other volatile chemicals; the CPSC advises additional washing and, where possible, line drying rather than putting such garments straight into a dryer.
A clean lint screen is important, but it is not the whole exhaust system. The safe routine is simple: isolate the dryer, clean only what you can reach, verify the outside airflow, reconnect every part and call for help before access or uncertainty becomes the hazard.
For another appliance-care project, the washing-machine cleaning guide and refrigerator-cleaning guide use the same rule: follow the model manual, clean accessible parts and do not treat a stronger chemical or more aggressive tool as a better maintenance plan.
Hero image: Chalome, CC BY-SA 3.0, via Wikimedia Commons.
Sources
Frequently Asked Questions
How often should you clean a dryer vent?
Use your dryer's manual and the vent layout as the main guide. The U.S. Fire Administration recommends cleaning dryer vent ductwork every year, while GE recommends inspecting and cleaning exhaust ducting at least annually. Clean the lint screen before and after every load.
Can I clean a dryer vent myself?
You can usually clean a short, accessible duct if you can safely unplug the dryer, disconnect the duct and reconnect it correctly. Use a qualified professional for a roof or long concealed route, damaged venting, a gas-service issue or lint you cannot reach without opening the dryer chassis.
How do you clean a dryer vent from the outside?
With the dryer off, inspect the exterior hood, remove only loose visible lint and confirm the flap is free. A full clean usually also requires access from the dryer end; do not push a brush blindly into a long or roof-mounted duct.
What are the signs of a blocked dryer vent?
Longer drying times, clothes that remain damp, weak airflow at the outside hood, a dryer that becomes unusually hot or a check-vent warning can all point to restricted airflow. Stop and arrange service if cleaning the accessible path does not solve the symptom.