Quick answer
To tie a full Windsor, start with the wide end on your right and much lower than the narrow end. Cross wide over narrow, pass it through the neck loop twice, then down through the front loop; tighten gently and finish with the tip at your belt.
A tie looks complicated until you stop treating it like a puzzle. It is just one long strip making a few controlled passes around a shorter one. Learn the sequence once and you can tie it in a bedroom, a hotel room, or five minutes before a meeting.
This guide uses the full Windsor knot because it is symmetrical, polished, and easy to check in a mirror. It is not the only good knot. Later, you will see when a four-in-hand or half Windsor makes more sense.
Before you start: choose the right knot
Your knot should match the shirt collar, the occasion, and the amount of fabric in the tie.
| Knot | Shape | Best use |
|---|---|---|
| Four-in-hand | Slim, slightly uneven | Everyday shirts and narrow collars |
| Half Windsor | Medium, balanced | Work, interviews, and most dress shirts |
| Full Windsor | Large, symmetrical | Spread collars and formal occasions |
The full Windsor uses more length than the other two. If you are tall or your tie is short, a half Windsor may reach the right place more reliably. A knot that ends at your belt beats a theoretically perfect knot that ends at your ribs.
How to tie a tie: the full Windsor in 7 steps
Stand in front of a mirror with your shirt buttoned and collar up. Keep the tie’s front side facing out. The wide end starts on your right; the narrow end starts on your left.
1. Set the starting lengths
Place the wide end substantially lower than the narrow end — roughly 25–30 cm (10–12 inches) lower is a useful starting point for an average-height adult. The exact gap depends on your height, the tie’s length, and the size of the knot.
Keep the narrow end near the middle of your torso. Do not worry about its final position yet. The wide end is the part you will move; the narrow end is the post around which you build the knot.
2. Cross wide over narrow
Take the wide end from your right and cross it over the narrow end toward your left. You should now have an X just below your collar, with the wide end on the left side.
Hold the crossing point lightly with your thumb and forefinger. This keeps the knot from drifting while your other hand makes the next pass.
3. Bring the wide end up and down through the neck loop
Lift the wide end behind the crossing point and pass it up through the loop between the tie and your neck. Then bring it down on the left side.
You have made the first side of the Windsor. The visible shape may look loose and lopsided at this stage; that is normal. Do not pull it tight yet.
4. Wrap behind the narrow end
Move the wide end behind the narrow end from left to right. It should disappear briefly behind the fabric, then hang on your right side again.
Keep the narrow end centered. If the narrow end has twisted, flatten it now so the back of the tie does not show through the finished knot.
5. Pass up through the neck loop again
Bring the wide end up from underneath and pass it through the neck loop a second time. Pull it down toward the front on the left side.
The two passes create the broad, symmetrical sides of a full Windsor. Keep the fabric flat rather than letting it bunch. A flat tie makes the last step much easier.
6. Pull the wide end through the front loop
You should now see a loose horizontal loop at the front of the knot. Take the wide end and bring it down through that front loop, from top to bottom.
Feed the entire wide end through without twisting it. The front of the tie should face outward, and the knot should now resemble a triangle.
7. Tighten, shape, and check the length
Hold the narrow end with one hand and slide the knot upward with the other. Tighten gradually; do not yank the fabric, because hard pulling makes creases and can loosen the collar.
Before you fold the collar down, check three things:
- The tip of the wide end reaches the middle of your belt or waistband.
- The knot sits at the top button without leaving a large shirt gap.
- The front is centered and the tie is not twisted.
Fold the collar down, tuck the narrow end into the keeper loop on the back, and make a small dimple directly below the knot by pinching the fabric as you finish tightening. The dimple is optional, but it gives the knot a deliberate shape.
The three fit fixes beginners need
The tie is too short
Start again with the wide end lower. A full Windsor consumes a lot of length, so lower it by 5–8 cm before rebuilding. If the tie is still short, switch to a half Windsor or four-in-hand.
The tie is too long
Start with the wide end higher, or use a smaller knot. Do not solve the problem by hiding a large amount of the wide end in your trousers. That creates bulk and the narrow end may show below the wide end.
The knot is crooked or bulky
The most common cause is a twisted pass or an uneven starting cross. Untie it, lay both ends flat, and repeat more slowly. A Windsor should look broad and symmetrical, not like a tight rope around your collar.
When a different knot is better
The full Windsor is formal, but it is not automatically the right choice.
- Use a four-in-hand for a quick, relaxed everyday look. It has fewer passes, works with most ties, and is forgiving when you are learning. Its slight asymmetry is part of the style.
- Use a half Windsor when you want a neat, medium-sized triangle without using as much length. It is a reliable choice for work, interviews, and a standard point collar.
- Use a full Windsor when your collar has a wide spread or the occasion calls for a stronger, symmetrical shape. Keep the rest of the outfit quiet so the large knot does not compete with the shirt.
For an interview, the practical order is simple: a clean shirt, a tie that reaches your belt, and a knot you can make calmly. Use the job interview preparation guide for the rest of the pre-meeting checklist, and make sure your resume is ready before you spend twenty minutes debating knot names.
A two-minute practice routine
If you need to learn quickly, practice the same knot three times rather than watching ten different tutorials:
- Tie it slowly while reading the seven steps.
- Untie it and repeat from memory, checking only the final length.
- Tie it once with your eyes on the mirror, then once by feel.
Leave the tie hanging around your neck between attempts. The starting-length adjustment is the part that improves fastest with repetition. If you are packing for travel, fold or roll the tie carefully instead of crushing it at the bottom of a bag; the carry-on packing guide has a compact checklist for the rest of your clothes.
The sequence is the skill: cross, loop, wrap, loop, front loop, tighten. Once your hands remember those six movements, tying a tie stops being a last-minute emergency and becomes a small, repeatable routine.
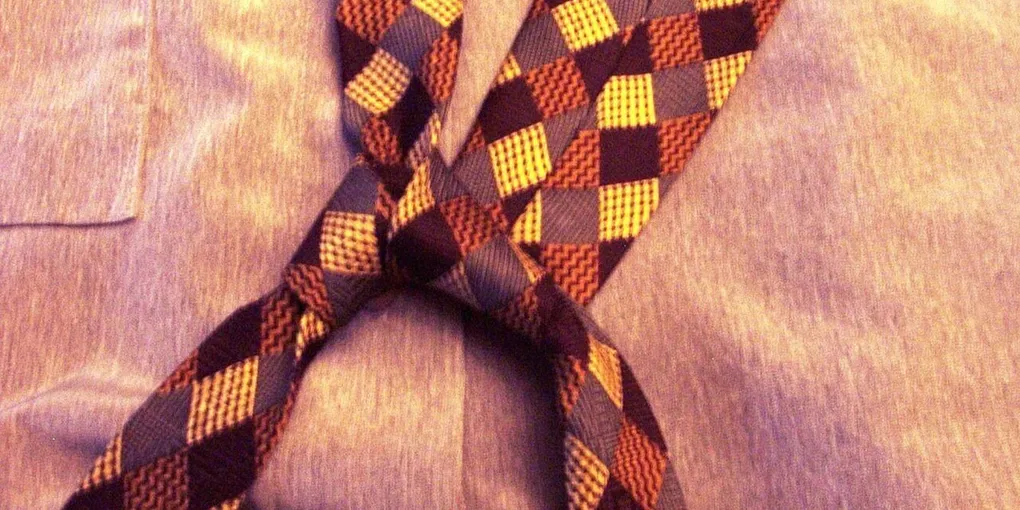
Hero image: Ruizo, CC BY-SA 3.0, via Wikimedia Commons.
Frequently Asked Questions
What is the easiest way to tie a tie?
The four-in-hand knot is the easiest everyday method: cross the wide end over the narrow end, wrap behind and across the front, pass it through the neck loop, and pull it down through the front loop. It is slightly asymmetrical, which makes it forgiving for beginners.
How long should a tie be when you finish tying it?
The tip of the wide end should land around the middle of your belt or waistband. If it finishes above your belt, start with the wide end lower; if it hangs far below it, start higher or use fewer wraps.
Which tie knot should I use for a job interview?
A four-in-hand works with most shirts and gives a slim, slightly asymmetrical knot. A half Windsor is a balanced middle option, while a full Windsor creates a larger, symmetrical triangle that suits a spread collar. The clean fit matters more than choosing the fanciest knot.
Can you tie a Windsor knot without a mirror?
Yes. Feel for the front loop with your fingers, keep the narrow end still, and use the finished belt position as your check. Practice once with a mirror first, then repeat the same sequence by touch.